INF Scripting
To make your level geometry interactive you would need to learn the INF programming language. Scripts written in INF tell the JEDI engine to control almost every component in the game. From moving elevators, morphing platforms, opening doors, changing lights, moving water and completing objectives, the possibilities for unique adventures in Dark Forces are endless. One can create some amazing and unique experiences not present in the base game.
This tutorial will gradually introduce you to the basic INF concepts. While it helps to understand programming, it is not required as the INF script is more similar to a state machine than modern object-oriented programming. For this section it is critical that you have the community-made INF documentation open as you follow along. Therefore make sure to open this page and keep it handy. It contains Dark Forces component specifications such as GOBs and LFDs but we will be focusing on the INF section.
Important!
While this guide will take things slowly, remember not to get frustrated at the complexity you may encounter. Take your time and be patient, go do something else and come back. The best way to learn is through practice and experimentation!
With that out of the way, go ahead and start a new project and switch to the Scripting tutorial .
INF Editor
All the script editing you will be doing is done in the INF Editor. There are many ways you can bring it up. You can choose it from the main menu or you use the hotkey I.
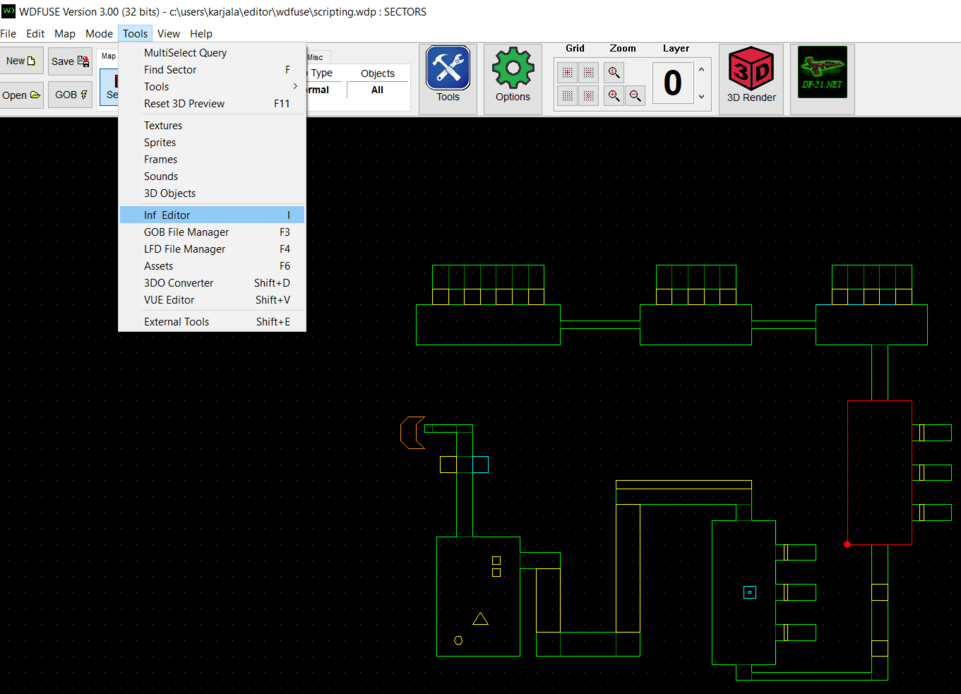
INF scripts are applied to Sector and Wall components in Dark Forces. Every time you open the Sector or Wall Editors you will see the a small INF icon at the top. By clicking this icon you can also bring up the INF editor. Sectors that have any INF code are colored yellow on the map.
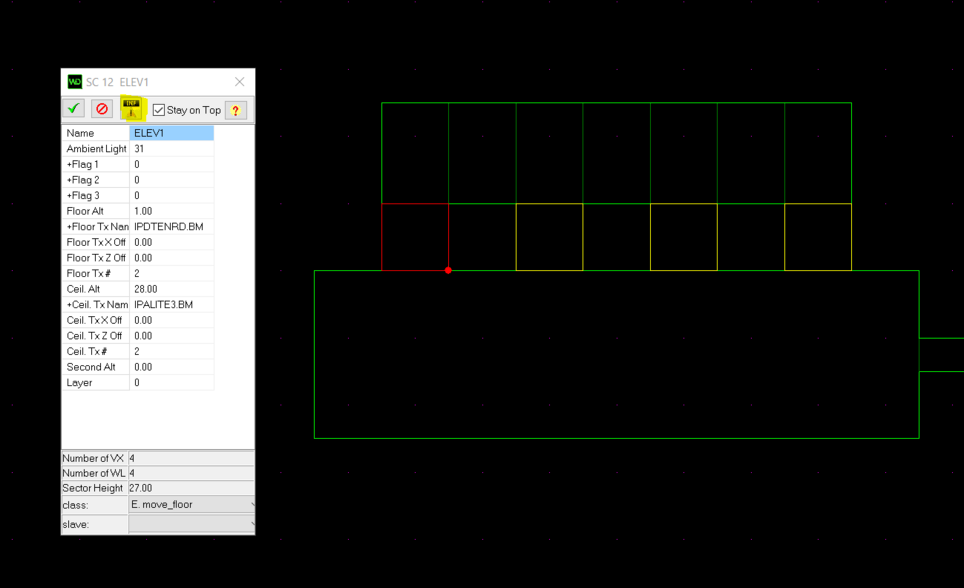
From any Sector or Wall editor you can click the Yellow INF button at the top or press F2 . The hotkey is different from the main map.
Go ahead and click on the sector named ELEV1 and then open the INF editor for that sector using any of the methods described above.
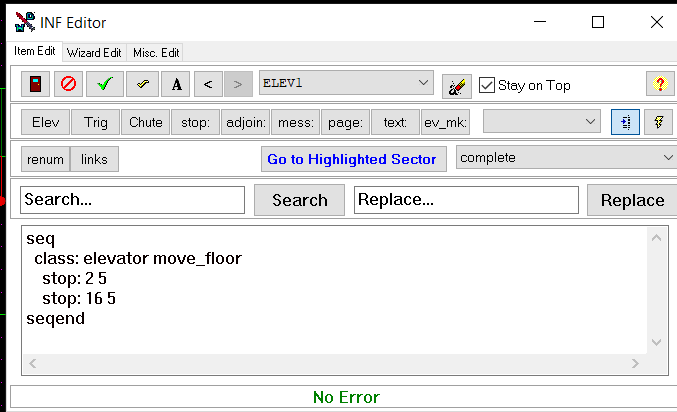
Here you will see a rather complicated window but we will concentrate on only a few components here. The main one is the Script Text Editing Area at the bottom. This is where you will write all your INF scripting code. When you're asked to edit or write something you will go to that text area and make changes. Just like the other windows at the top is the green check mark box. When you are done editing, press it to commit and save your changes. One important difference with the other editors is you cannot autocommit your work as it is very easy to make a mistake and break everything.
Above the text area you can Search and Replace text. This is useful if you have a very large script. At the bottom you will see a small No Error bar. If you make a syntax mistake this will turn red and warn you about an error. The line in your INF code that has an issue will be highlighted.
Center top you will see the name of the INF code titled ELEV1. Every sector that has INF logic applied to it must have a name. To the left of the sector name you will be able to Change your Font button. And to the left of that is a useful checkmark button that Verifies Syntax. Click it if you want to make sure nothing is broken but you don't want to commit your changes. You can also rollback your changes and exit the editor. To the right is the useful "Stay on Top" button. The blue "Go to Highlighted Sector" button is useful to jump to a sector that is referenced in your code. There are many more components here but this is enough to get started.
INF Structure
Lets look at the code in detail. Take your time to understand everything shown.
seq
class: elevator move_floor
stop: 2 5
stop: 16 5
seqend
Every INF script begins with the word SEQ (for Sequence) and ends with the word SEQEND. If you do not have these at the beginning and end your code will not work and you will get errors. Inside the sequence there can be one or more Classes. The Classes are major sequences components that tell the JEDI engine what type of action this sector must take. For a full list of Class Elevators please refer to the DF Specs page .
Class Elevators
All classes in the game are made out of Elevators. In fact, almost every kind of game logic in the game is done with an elevator. That's how Dark Forces keeps track of the level state and makes things interactive. Elevators make sectors and walls dynamic. They can obviously be used to create lifts, platforms, doors etc., but you often also need dummy (i.e. non-accessible) elevators for level control purposes.
Elevators will usually have Stops, which are different values the elevator can arrive at. In the example above, the elevator has two stops.
Class Stops
A Stop is a value that an elevator can arrive at. This value varies depending on the class of elevator, and can be floor altitude, ceiling altitude, ambience, degrees etc. Stops can be used practically, such as different heights a lift stops at, or can be used purely for level control as elevators can also send a message, page a sound, or create an adjoin upon arriving at a stop.
Note: Elevators can have any number of stops. If no stops are given, the elevator will start at value 0 and keep increasing its value throughout the entire level. This may be appropriate for an "elevator scroll_floor", but not for an "elevator move_floor" !!!
usage:
| | stop: [value1] [value2] |
The first value can be given in three ways:
[num] absolute stop
| @[num] relative stop | [sectorname] equal the value of the sector [sectorname] |
The second value can be given in 4 ways:
[time] time in sec that elevator remains at stop
| hold elevator will remain at stop indefinitely | terminate elevator will stay at the stop permanently | complete mission will be complete when elev arrives at stop |
Elevator Move_Floor
Lets see what this ELEV1 sector is doing. Launch the game (GOB) and take a look at the row of elevators in front of you.
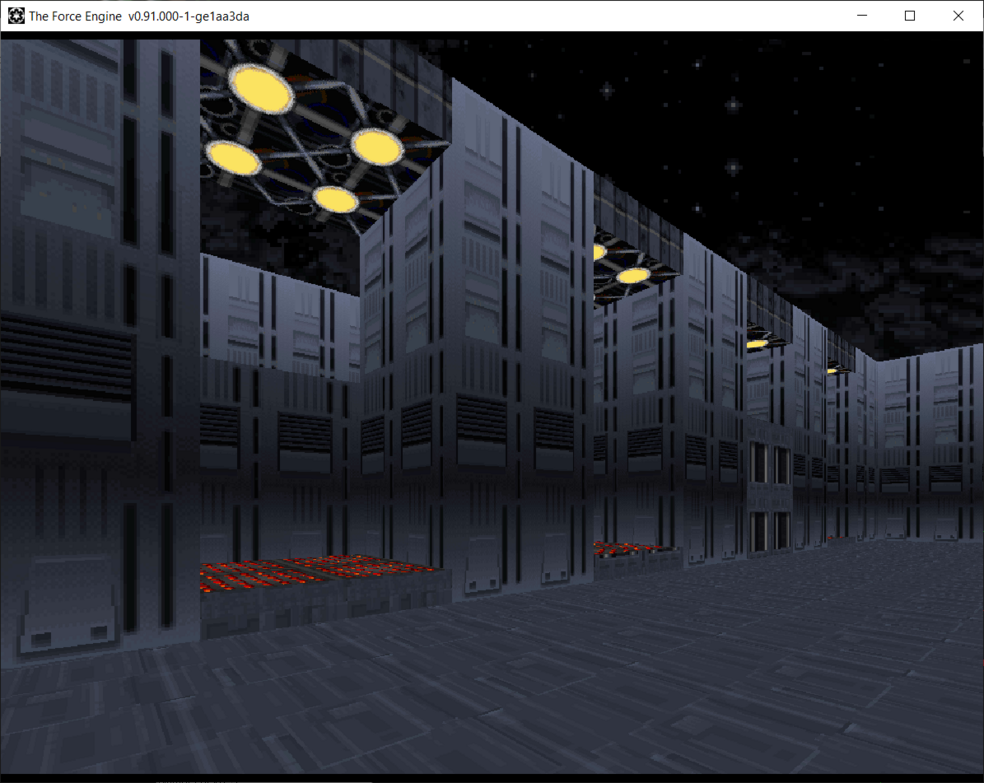
Our elevator is on the left and you will see that all it does is automatically move up and down by itself. According to the code (INF Text Area) this elevator has only two stops. For an elevator of type move_floor the stops are the heights at which it will stop. In this case, the first stop is at height 2 and the second one stops at height 16. The second number is the delay (in seconds) at how long this elevator should stay at the stop. In this case, both stops will wait for 5 seconds before going to the next stop. This elevator will go in an infinite loop between these two stops.
From this point on, any time you make a change to the script, make sure you exit the game, save and rerun it to see what has happened. We cannot rely on the 3D renderer as much because it doesn't contain INF logic.
Lets start making our first changes! Just like in real life, an elevator can have multiple stops. Lets add one more stop.
seq
class: elevator move_floor
stop: 2 1
stop: 8 1
stop: 16 1
seqend
Add a stop at height 10 and change all the delays to 1, nobody wants to wait that long between stops! Now run the game. What happens?
Add a stop at height 10 and change all the delays to 1, nobody wants to wait that long between stops! Click the Syntax Checker button at the top to make sure you didn't make a mistake. If you did, the bar at the bottom will to red and the error will be highlighted. Now run the game. What happens?
The elevator moves at the same speed but the stops are much shorter right? Also notice that when the elevator comesdown, it doesn't stop in the middle. This is because it runs all the stops from top to bottom. If you wanted it to stop in the middle again you would have to add another stop: 8 1 below the last stop.
Texture Anchoring
Lets look at elevator ELEV2 next to it. The code is identical to ELEV1 but something is really wrong with it...
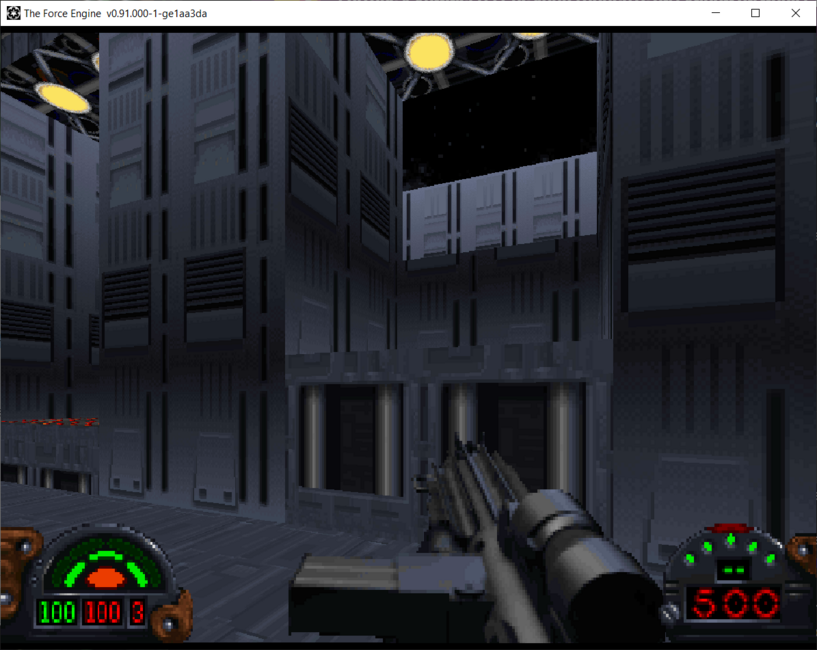
The textures aren't stationary, they move along with the elevator! This is because for elevators one needs to tell the textures that they must be anchored as the sector moves up and down. This is done with the Wall Editor's Flag1 section. Click on the elevator wall in front of you and take a look.
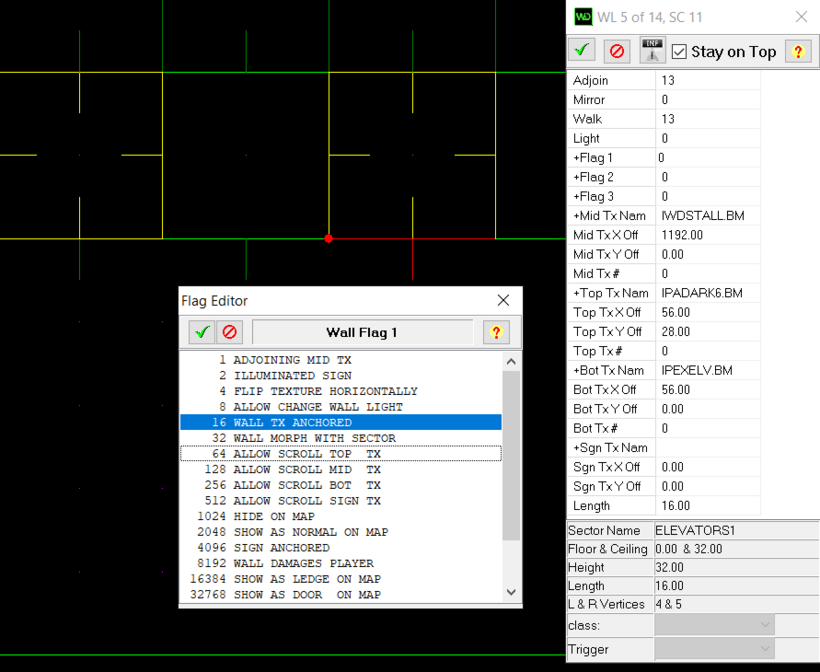
Make the change to the flag by turning on the WALL TX ANCHORED (16) flag.
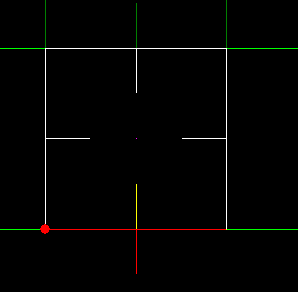
You will need to do it to the two side walls and the wall of the top ledge as well. Make sure you multiselect by holding the SHIFT button to do it faster. Use the image above of the highlighted walls to make your change (You can always look at how ELEV1 wall flags are set as well). Once you are done making your changes, launch the game and confirm the textures look aligned now.
Elevator Move_FC
Lets jump to the next elevator ELEV3. You will notice that the class has changed.
seq
class: elevator move_fc
speed: 30
stop: 2 5
stop: 16 5
seqend
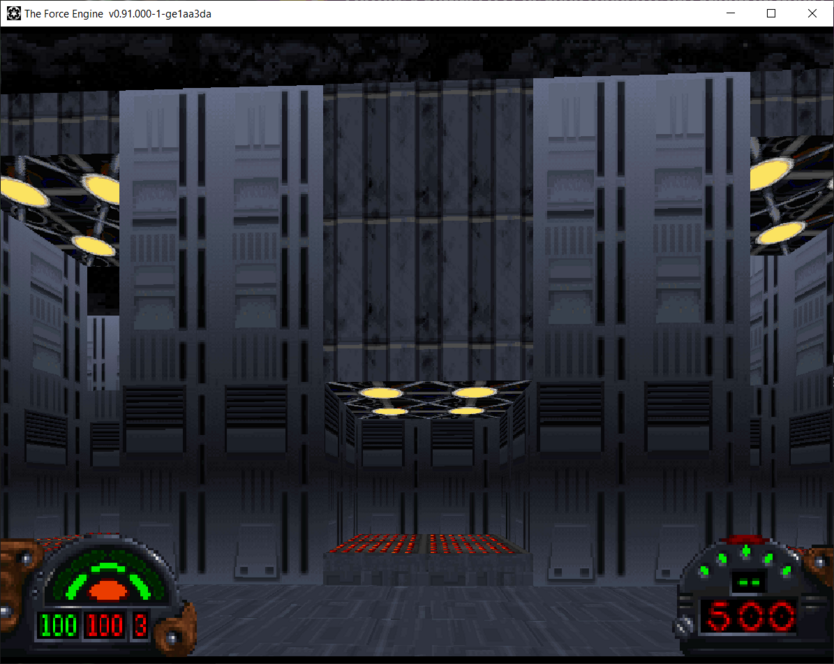
While the stops are the same, the elevator class has changed. FC stands for "FloorCeiling" and this means that both the floor and ceiling will move at the same time. There is also a new keyword called speed. The name is self-explanatory, it just tells the elevator how fast it should be moving. If you run the game you will see that the ceiling moves along with the floor.
Elevator Audio
The elevator on the right is ELEV4. Here is the code for it, it's back to move_floor but now there are more changes.
seq
class: elevator move_floor
sound: 1 ELEV3-1.VOC
sound: 2 ELEV3-2.VOC
sound: 3 ELEV3-3.VOC
speed: 5
stop: @0 5
stop: @14 5
seqend