Objects
In this tutorial we will talk about Dark Forces objects. These include the enemies you fight, the items you pick up, the sound effects and the 3D renderings of the Moldy Crow. Some objects are visible and some are invisible. Some have logic assigned to them and some do not. In this section we will do a deep-dive of all the object types and how to use them in WDFUSE.
To get started load up the Objects tutorial in the New Projects ( Ctrl+N ) section. Load up the map and switch to Object Mode.
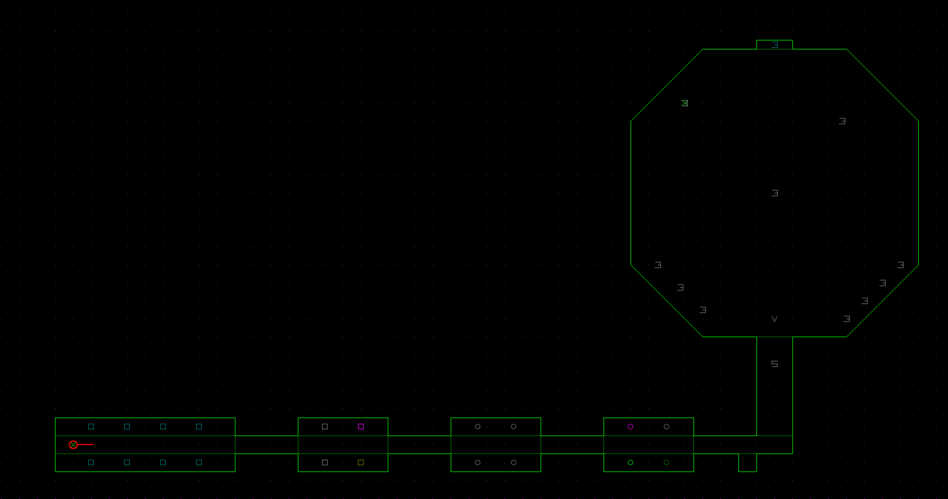
Object Editor
It's time to learn about Object Editor properties. While in Object Mode go ahead and select the Player object on the left hand side (Object 0).
Object Properties
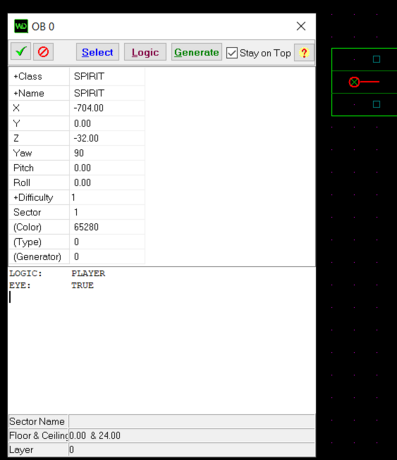
Just like the other editors you will see that each Object has a numerical ID. In this case the OB # is 0. Let's go over the properties of the object
- Class - This is the Type of object. For example, it could be a Sprite or a Frame or a Sound
- Name - This is the name of the of the object. For example a Stormtrooper or an extra life.
- X - The X position on the map.
- Y - The Y altitude on the map.
- Z - The Z position of the map.
- Yaw - The Yaw rotation of the object.
- Pitch - The Pitch rotation of the object.
- Roll - The Yaw rotation of the object.
- Difficulty - The Difficulty setting of the object (Ex: An extra life only appears on Easy mode).
- Sector - What sector the object belongs to.
- Color - The Color of the object on the map.
- Type - The Type of the object (Ignore - for now).
- Generator - Does it use a generation logic (Respawning stormtroopers).
At the top you will see the ubiquitous Commit, Rollback and Stay-on-top buttons as well as the new Select, Logic and Generate buttons. The Select button allows you to choose the object you want, the Logic will automatically assign the default logic for the object and Generate will load the logic to respawn the object (Infinite stormtroopers).
At the bottom you will see a text edit box for the object's Logic. And below that you will see the name of the Sector the object belongs to, the Floor and Ceiling heights as well as the map Layer in which the object is drawn.
Adding and Selecting an Object
Just like in the Geometry section you can Add an object by pressing the Insert key and it will make a copy of a new object. Or you can right click on the map and in the pop-up menu choose Duplicate.
Once the object is created you have two main ways to choose the object you want.
Method 1
You can double-click on the Class and choose the right type of object. A window pops-up with your class options.
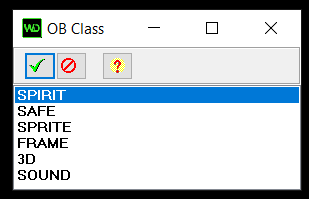
- SPIRIT - Invisible objects that are typically the Player themselves.
- SAFE - A class of objects that specify where the safe respawn areas are if you die.
- SPRITE - An objects that is a collection of frames (WAX files). Typically an enemy or an animate pick-up item.
- FRAME - A single frame object that is typically a decoration or a non-animated pick-up item,
- 3D - A 3D object like the Moldy Crow ship.
- SOUND - A sound object that plays in that area.
Go ahead and choose SPRITE as your object class.
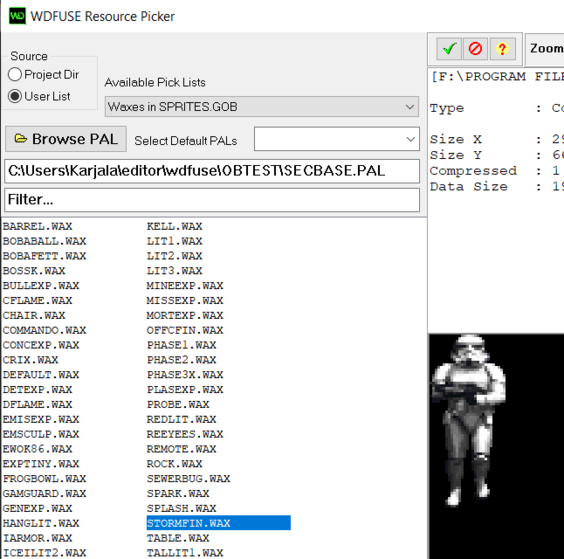
Once you choose your sprite class a Resource Picker window instantly appears where you can choose the name of your object. This window will be very similar to the texture choosing window you saw in a previous tutorial.
Depending on the class you've chosen the data will be loaded from a different GOB. So Sprites and Frames will load from SPRITES.GOB , while Sounds will load from SOUNDS.GOB and 3D Objects will load from DARK.GOB.
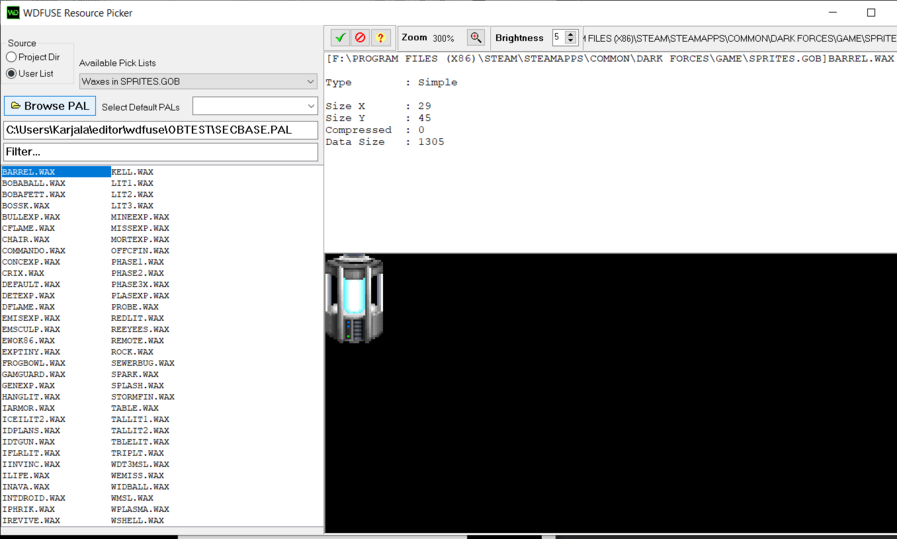
Here you can see a list of WAX sprites. They can be animated decorations like the BARREL.WAX as well as enemies like STORMFIN.WAX. You can choose the sprite on the left-hand side and you'll get a preview on the right hand side. You will see additional information at the top right of the size and animation information of the object.
Just like the texture picker window you can search using the Filter and decide on your color palette. At the top left you can also choose the custom sprites from the Project Directory or from the User List (The GOB contents). You can Commit and Rollback your changes at the top right and you can also change Zoom and and Brightness of the Sprite.
Go ahead and choose the STORMFIN.WAX and press Commit (Green checkbox at the top).
If you get prompted for an object sequence - just press Ok. That specifies the animation sequence but you don't need to worry about that.

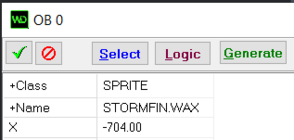
You can see that the Object Name has changed to STORMFIN.WAX
Method 2
Another way to choose your object is to hit the Select button at the top. You will see a window to choose your object name.
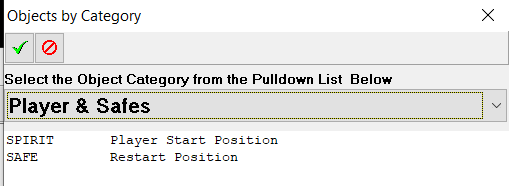
If you click on the pulldown in the middle you can switch categories.
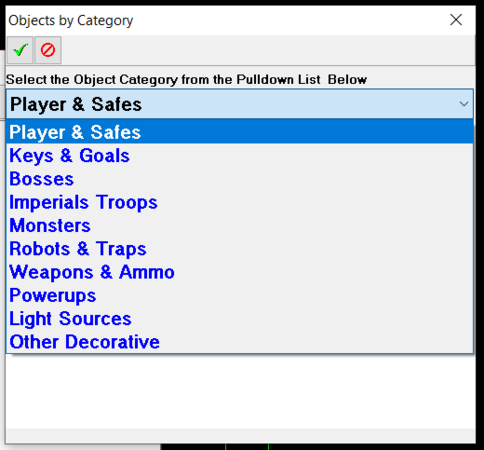
When you are done looking through the various types, switch back to Player & Safes category and choose Player and Commit the name of the object.
Moving Objects
Just like the geometric components of Dark Forces you can move objects by holding the CTRL button and dragging the object all over the map.
We will try moving the player but first take a note the Y height of the object. At the beginning the height of the player is 0.
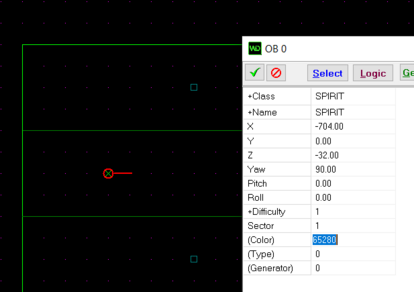
Now, go ahead and move the player object to the sector ledge just above the starting point. Notice that the Y - height has changed from 0 to 2.
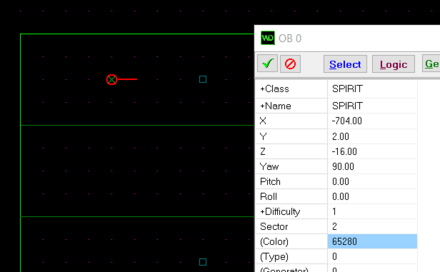
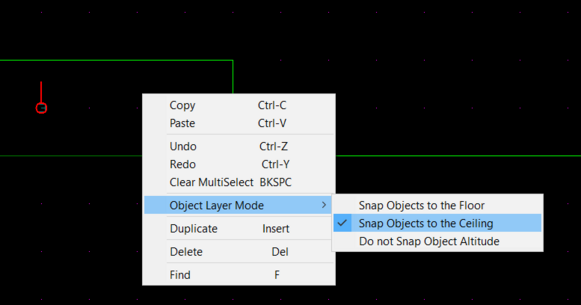
This is because objects snap to the floor by default. Whatever sector you move them to they will snap to that sector's floor. You can always change this functionality by right clicking on the map to bring up the pop-up menu, switching to Object Layer Mode .
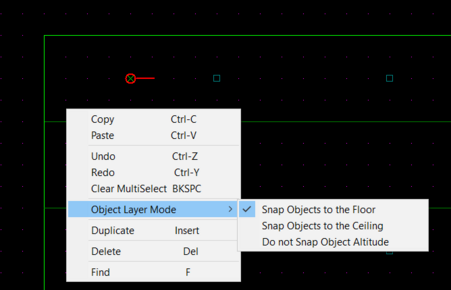
It's pretty self-explanatory. But when you choose the Snap Objects to the Floor the object will snap to the sector's floor when you move them, when you choose Snap Objects to the Ceiling - they will snap to the ceiling and Do not Snap Object Altitude will do nothing. For now keep the snap mode to the floor.
Note: Remember that you always must have a player object to test your mission. If you are missing the object or it is not inside a valid sector the game will crash.
Difficulty
Every object is either added or removed based on the difficulty of the mission. If you double click on the Difficulty parameter you will get a new pop-up that shows you the table of difficulties.
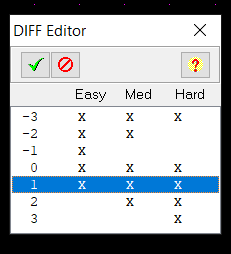
Every time you see an "X" it means that this object will appear in the difficulty you selected. Many enemies only appear on the HARD difficulty and many powerups like an extra life are only available on Easy Mode.
Please be careful when you assign a difficulty. If you have an Imperial Officer with a critical Yellow key that only appears on the Easy difficulty it means that you will not be able to complete the mission on Medium and Hard difficulties.
Object Colors
On the map you will see many different colored objects.
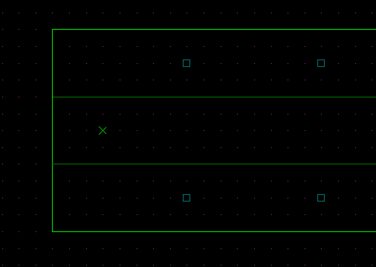
If you are not a fan of the default options, then you are in luck because these colors can be changed. To do that simply double click on the (Color) property of the Object Editor. Do that now with the Green-colored player object.
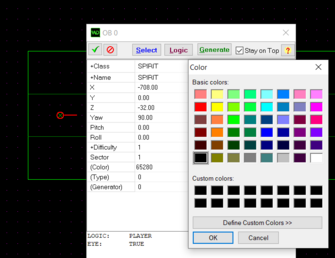
Here you can choose the color you like. When you are done choosing press Ok to go back to the screen.
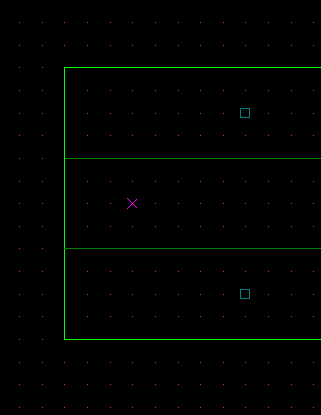
And now the color is changed. When you change the color for one object it will change the color for all objects of the same name! The color change is saved in your wdfuse.ini file and is preserved between editing sessions.
Sprite Objects
Sprites are groups of animated frames. They are stored in .WAX files and belong inside the SPRITES.GOB container.
Sprite Enemies
Go ahead and GOB your mission and you will find yourself in a hallway of of various enemies.
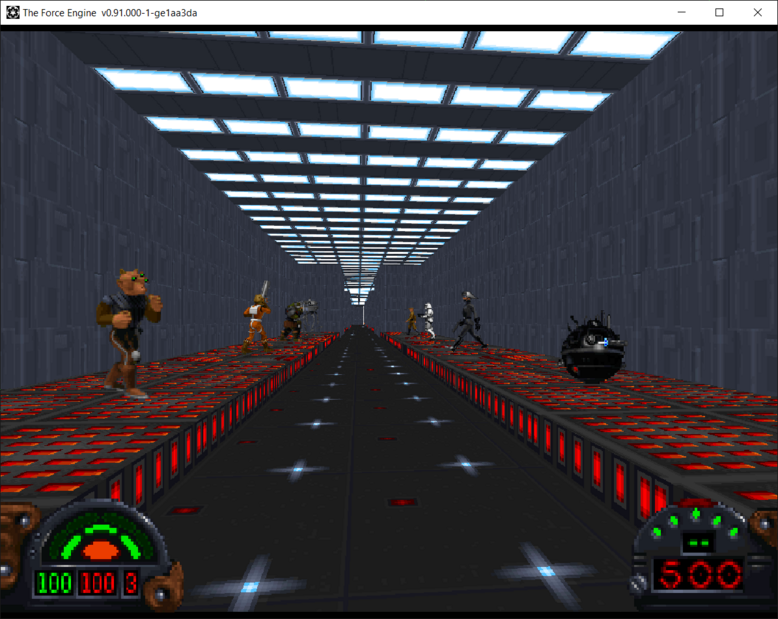
Don't worry, they won't attack you. All the logic from them has been removed and they are just empty husks.
In this first room you see Sprites. They are stored in .WAX files inside the SPRITES.GOB file. Each sprite is a collection of various frames showing some kind of action. Actions could be walking, shooting dying etc... it depends on the type of the sprite. The individual frames for STORMFIN.WAX can be seen in the image below. Dark forces plays through the individual frames when an action occurs.
Look at the image below. Notice that a stormtrooper enemy has the same action rendered multiple times to support directions. That is, the stormtrooper looks different depending which direction it is facing. Enemies like Stormtroopers have 8 directions, while other enemies like a Dianoga only has one (Facing you). Dark Forces supports up to 32 directions in each sprite.
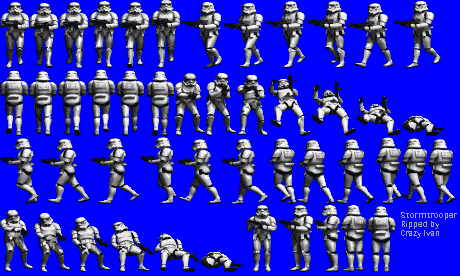
For now, all you need to know is that in Dark Forces, a Sprite is a series of animated frames that run when an action occurs.
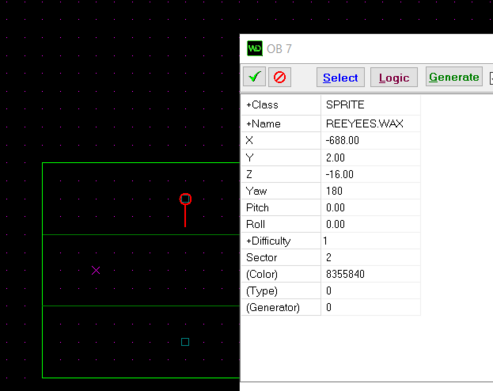
Go ahead and click on the Ree Yees (Gran) at the top in the editor.
Logic
At the moment Ree Yees doesn't have any logic assigned to them. To add default logic to them hit the Logic button at the top. ( If you get prompted for Object Sequences - just click on Ok and do that going forward in the tutorial. )
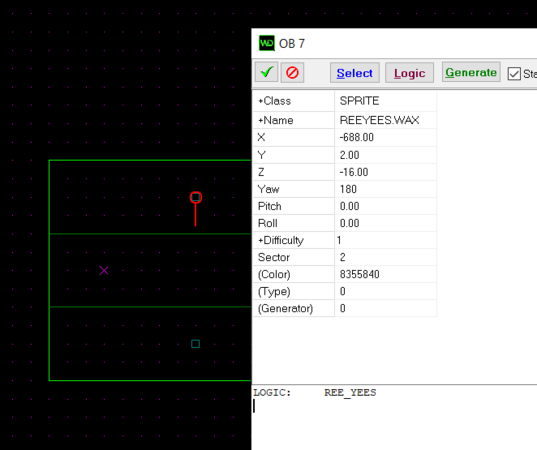
Now you will see that the bottom section (called the Logic Editor) has been updated to LOGIC: REE_YEES. What this means is that this particular sprite will now act like it is a Ree-Yees monster. Now exit the game (if you have it running) and Gob your mission again.
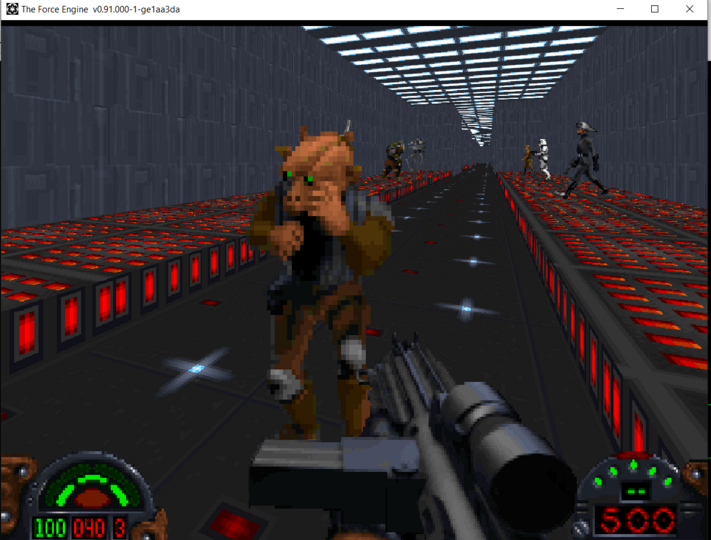
Now the Ree-Yees will attack you! This happens because the empty sprite husk is now given a logic. And the important thing to understand is that if the sprite supports it, you can apply logics from other sprites. Lets try that. Exit the game and go back to the object editor.
Edit the line in the Logic Editor to say LOGIC: TROOP .
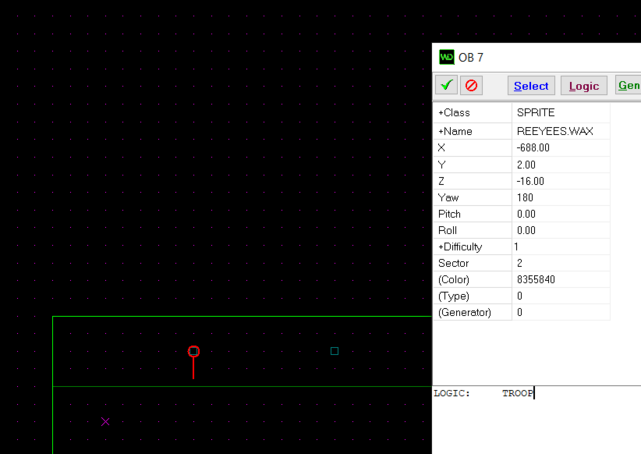
Gob the mission again and see what happens.
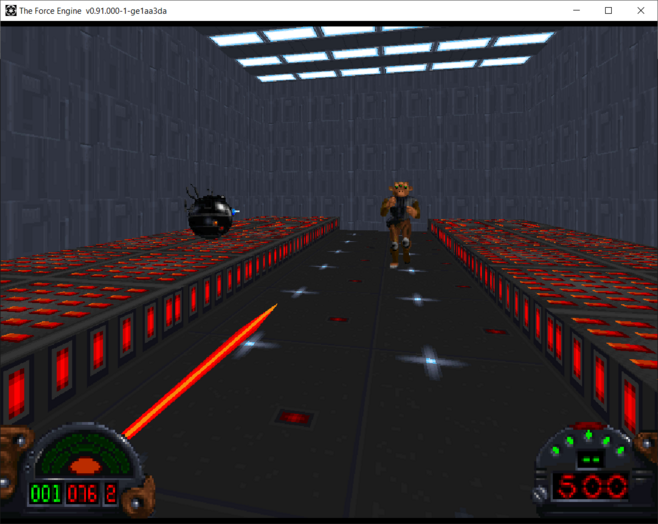
Now the Ree-Yees is acting like a stormtrooper. He is shooting blaster shots with his fists! When you kill him he will play the Death animation and will stay in that pose.
Remember! Each sprite is an empty shell until you give it logic. If you do not like the default logic that is provided by the Logic button at the top simply copy the logic from other objects.
Generation
Sometimes you may want to set your enemies to respawn. When you kill an enemy their body will disappear (leaving the weapon) and they will reappear after a few seconds. This is done through object generators. They will appear when they are outside your line of sight.
Select the Stormtrooper at the bottom and click the Logic button at the top to make them act like a stormtrooper and then the Generate button at the top of the Object Editor.
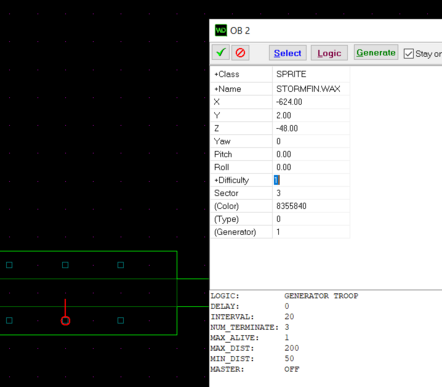
Lets go over the Generation logic components.
- LOGIC is the custom generation logic name. Give it a name GENERATOR STORM1 for example.
- DELAY is the time in seconds that needs to pass from the start of a level before the generator starts operating.
- INTERVAL is the time in seconds between each generation.
- MIN_DIST and MAX_DIST is the player distance to the object for it to be generated. If you are too far or too close they won't be generated.
- MAX_ALIVE: is the maximum number of enemies from the generator allowed alive at the same time.
- NUM_TERMINATE: is the number of enemies to be generated. When this is reached, the generator deactivates. -1 makes them respawn infinitely.
- WANDER_TIME: is the time in seconds that a generated sprite walks around before becoming inactive.
- MASTER can be ON or OFF turns the logic on or off.
Go ahead and set the stormtrooper generator logic to these values exactly into your Logic Editor and save.
LOGIC: GENERATOR STORM1
DELAY: 0
INTERVAL: 15
MAX_ALIVE: 3
MIN_DIST: 1
MAX_DIST: 200
NUM_TERMINATE: 4
Now Gob the mission. Run around the corner in the second room and hide here.
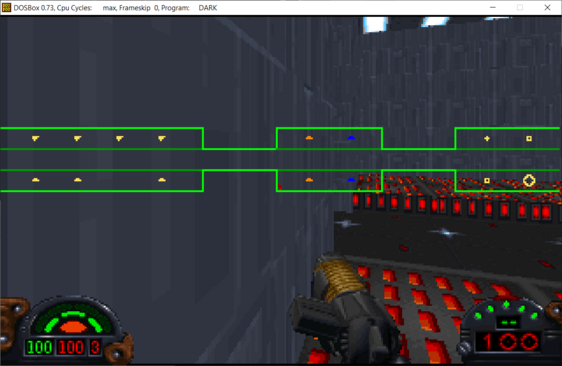
After 15 seconds you will see the stormtroopers begin to spawn. They will stop spawning after you kill four of them.
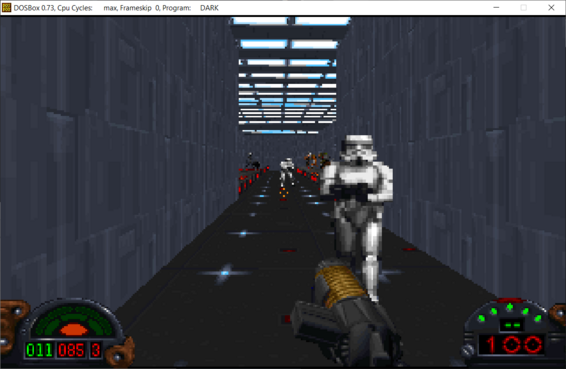
Feel free to enable the logic for other enemies in this room and experiment with it. Can you make pigs (Gammorean Guards) fly like a Probe Droid? Oh and for something really fun... what if you combine logics? Will you create crazy difficult boss?
Sprites Items and Decorations
Continue to the next room. Here you will see more sprite objects.
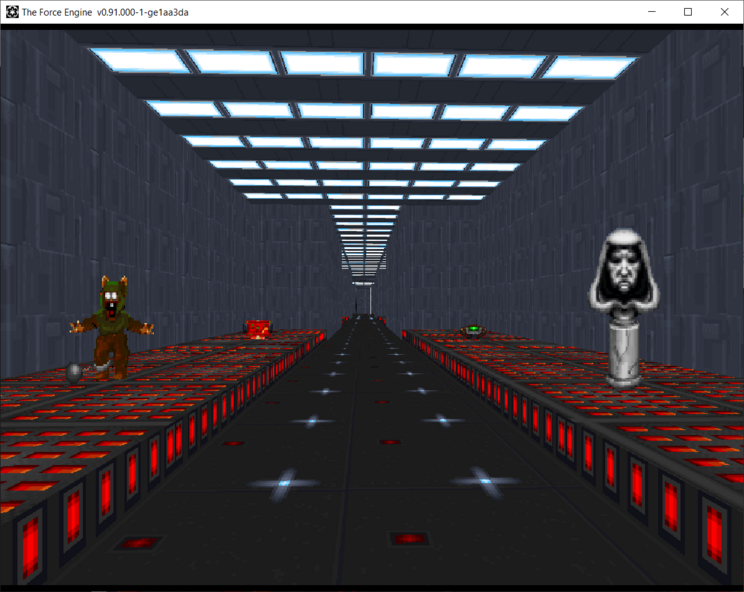
One of the key differences you will notice is that they all show the same image no matter what direction you are looking from. These sprites do not have the omni-directional frames that the enemies have in the previous rooms.
On the left is an animated decoration of an Ewok. All it does is stand there and animate the same thing in a loop.
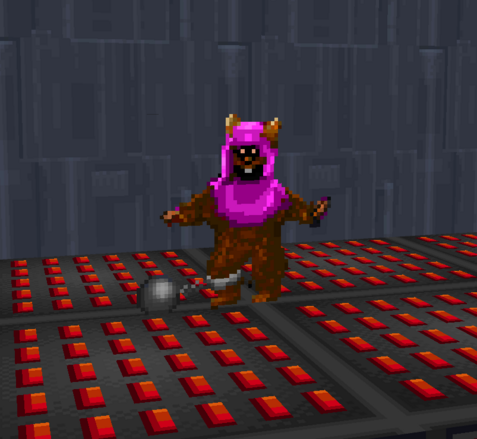
Lets open up the Logic Editor of this object.
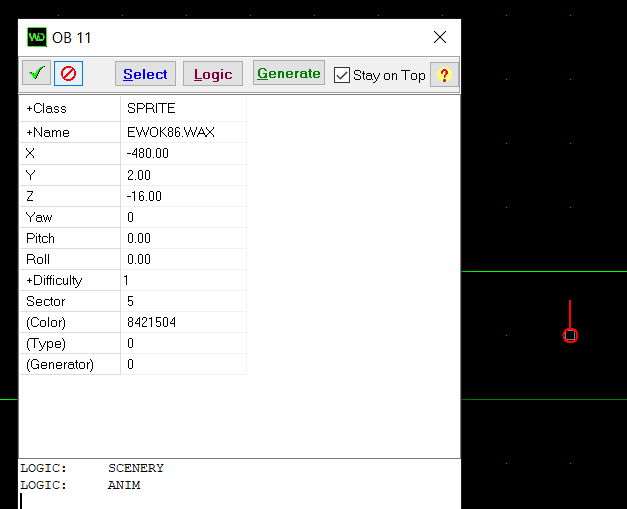
This item has two logic assigned to it; SCENERY and ANIM .
The ANIM logic means that this item will play the Ewok animation on a loop and the SCENERY logic marks as Scenery, which plays the death animation where it is destroyed upon interaction. In this case the stormtrooper plays the death animation and halts. Try shooting the Ewok to see the animation play (you monster!).
If you resisted murdering the poor Ewok, you can shoot the bust of the emperor to your right. Notice he instantly goes from alive to dead without playing any animations.
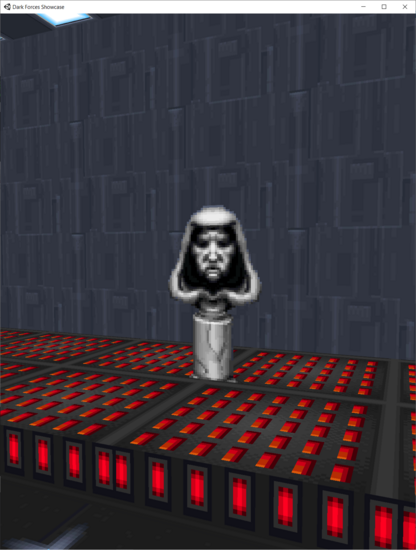
Lets look at the emperor bust logic.
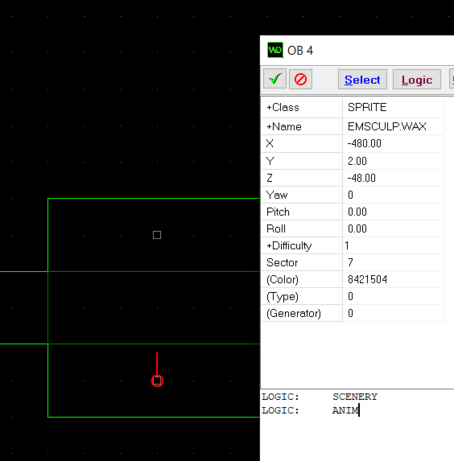
You can see it has both SCENERY and ANIM logics however, you don't really need the ANIM one. This is because the sprite only has two frames (alive and dead) and it doesn't need to play any animation. You can remove the ANIM logic - run the GOB and see that you can still destroy the emperor statue.
Lets look at the Death Star plans in the corner.
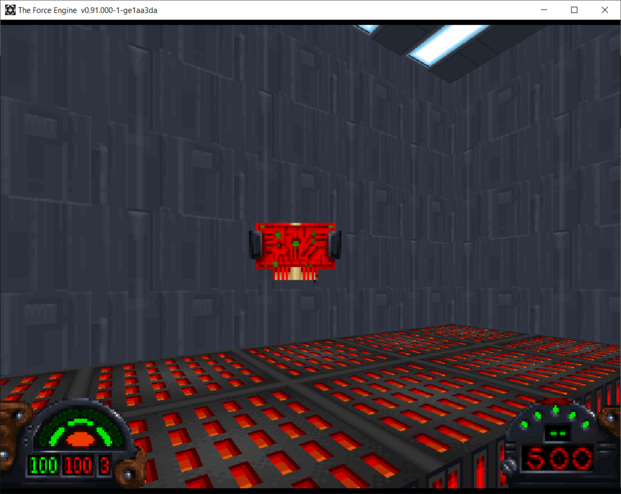
Notice that the Logic for them is only Logic: PLANS. I will tell you about an omission in the game. The death star plans are actually animated!
But the developers forgot the ANIM flag. We can fix that easily. Just add the ANIM logic.
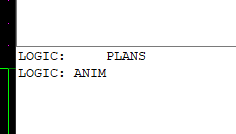
Then GOB your mission and you will see that the plans will be animated!
At the bottom right corner you will see shields. They are animated and have the ANIM logic turned on.
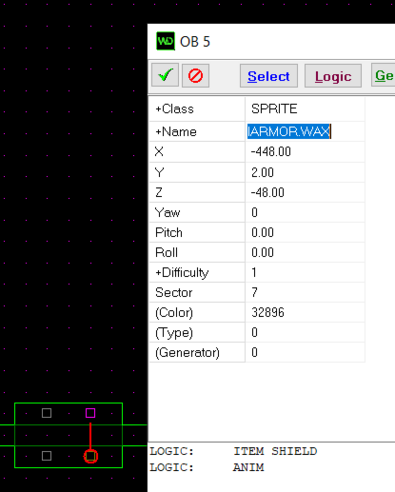
Remember that the logic is NOT tied to the sprite representation. Change the ITEM SHIELD logic to LIFE .
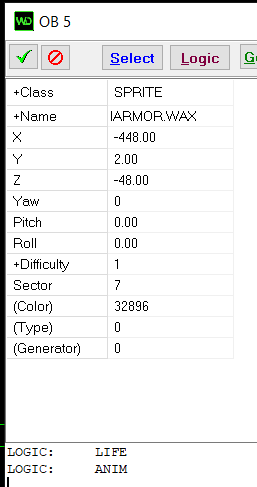
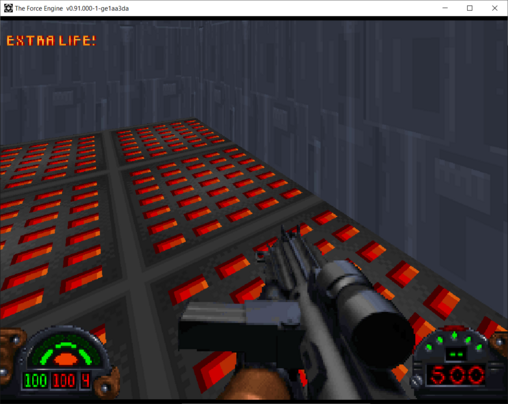
Gob your mission. Now when you pick up the shields you get an extra life!
Frames
Frames are an even simpler version of a sprite and are also located in SPRITES.GOB. Their filetype is .FME .They just have a SINGLE image. It will look the same from all sides. You can select them the same was as Sprites by either choosing the Select option at the top or by double clicking on the NAME of the object. Don't forget to change the class to FRAME .
Decorations
Usually frames are decorationd. Go on and enter the next room and you will see some frame objects.
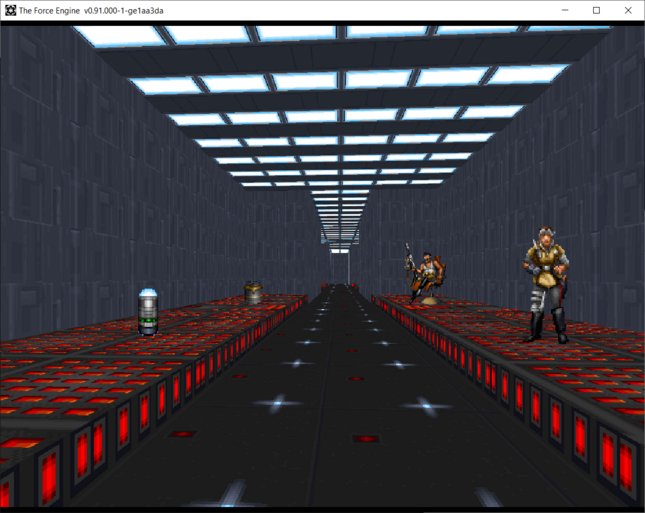
These are all decorations with a single frame. You can shoot them and nothing will happen because they do not have a death frame. Notice that none of them have any Logic assigned to them.
Items
Lets continue to the next room where we can find some items. All the objects here have a single frame items. When you pick it up the object will disappear.
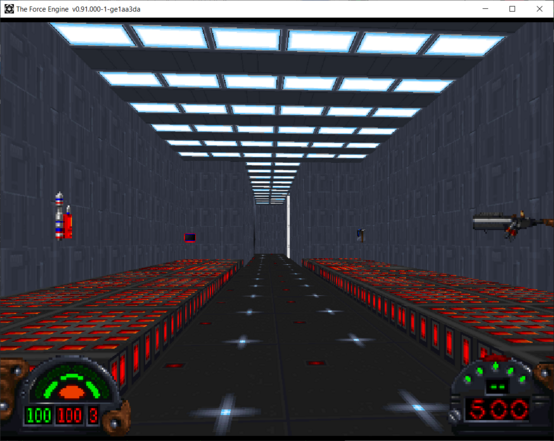
If you look at the logics they all match a particular item. You see logics for RED , CONCUSSION , CODE1 and ENERGY.
Here you can switch the logics for the item you pick up and it will behave differently. For example - the frame of the code keys (from Detention Center) is the same no matter what code you pick up. To change the # of the code just choose the logic CODE2 , CODE3 etc...
And keep in mind - you can always stack multiple logics to the same item.
For example, you can change the KEY logic to pick up all three keys at once!

You can also make the the concussion rifle be a pick up for multiple weapons at the same time.

Or you can make the energy also give you an extra life when you pick itup.

Go ahead an experiment with the logics. Some things may work and some may not. For "fun", you can always make an exploding Ewok by giving him a new LAND_MINE logic...
Safe Point
When you are done playing around with the logics continue down the hallway and !!! STOP !!! at the pit on your right.
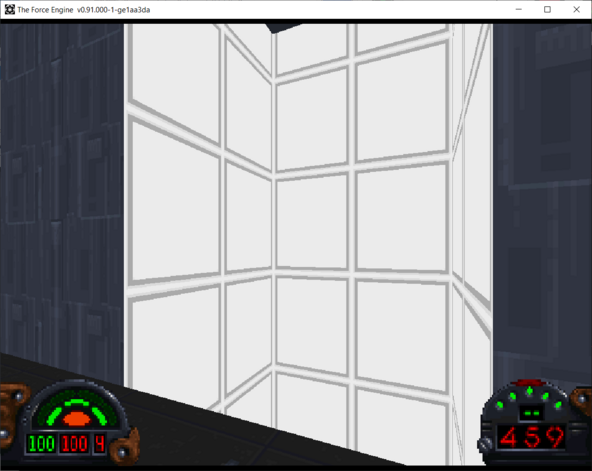
Go ahead and jump down and kill yourself. You will respawn at the beginning of the mission. But that gets annoying after a while.
How does Dark Forces respawn you further in the mission? That is done with SAFE point. You can open up the Object Editor and see that there is a Safe Point around the corner. Make sure you choose the CLASS and NAME of the object to SAFE.
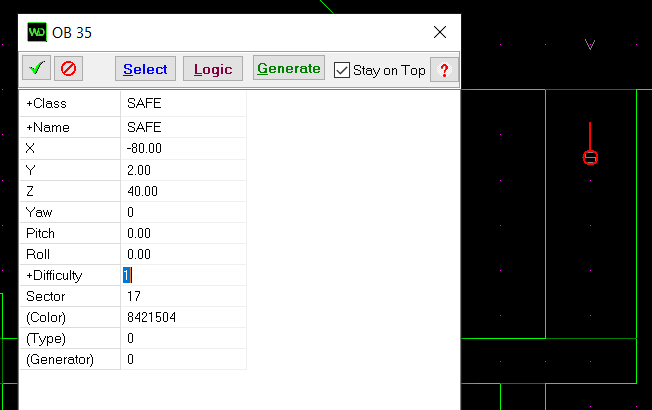
After you respawn run around the corner near where the SAFE point is. Your progress is now saved. When you jump into the pit again, you will respawn at the Safe Point.
Sounds
When you walk to the large room you will hear the sound of the wind (Make sure you have your audio turned on in the game). This is done with objects of the class SOUND. Go ahead and click on the sound object as soon as you exit the corridor.
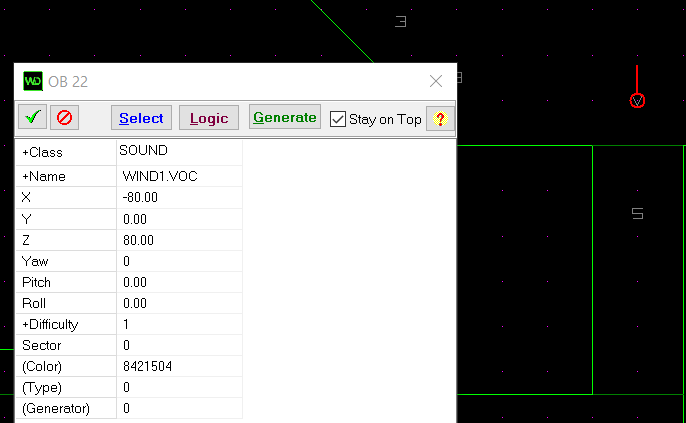
As you can see the sound being played is WIND1.VOC . You can change the sound by double clicking on the Name of the sound.
This will open a familiar Resource Picker window but now you can choose sounds. The sounds are .VOC files and stored in the container SOUNDS.GOB. Go ahead and do that now.
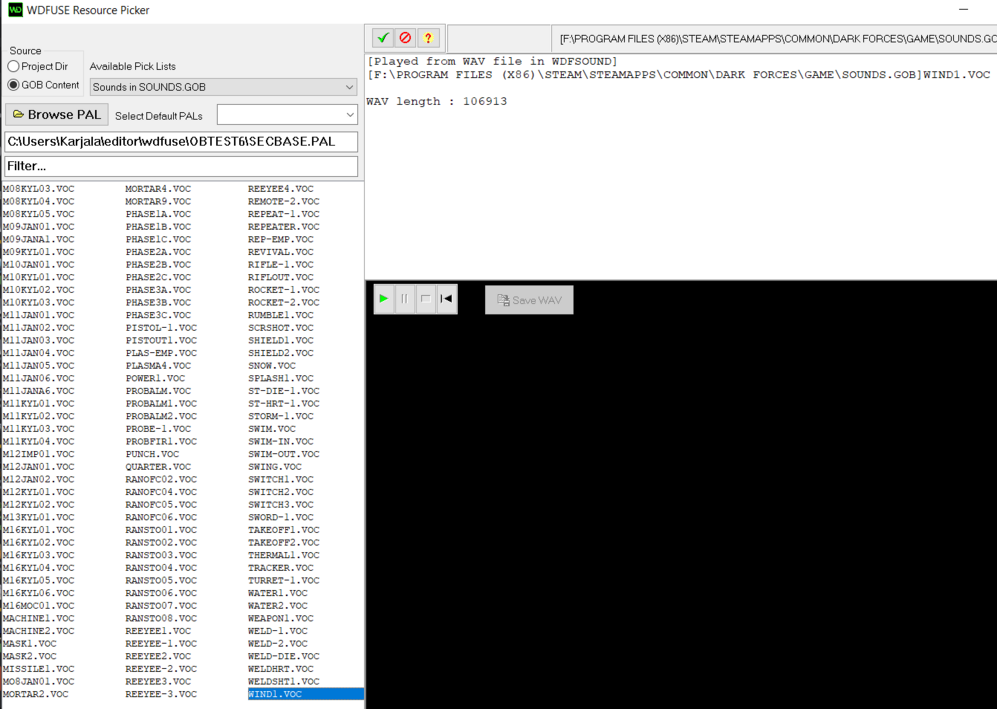
Just like before you can choose the sounds and filter them on the left hand side. The one big difference is that you can click on the play button on the right to Play the audio prior to choosing. You can also just press ENTER to automatically play the audio instead of clicking.
Because few applications will load the old .VOC sound files, you have the ability to convert the sound to a WAV file by clicking "SaveWav" button. It will be placed inside the WDFSOUND folder.
One final note - the JEDI engine can only play eight sounds at a time, so be careful what you choose.
3D Objects
Now lets look at the multiple 3D objects you see in the large showcase room at the end of the hallway.
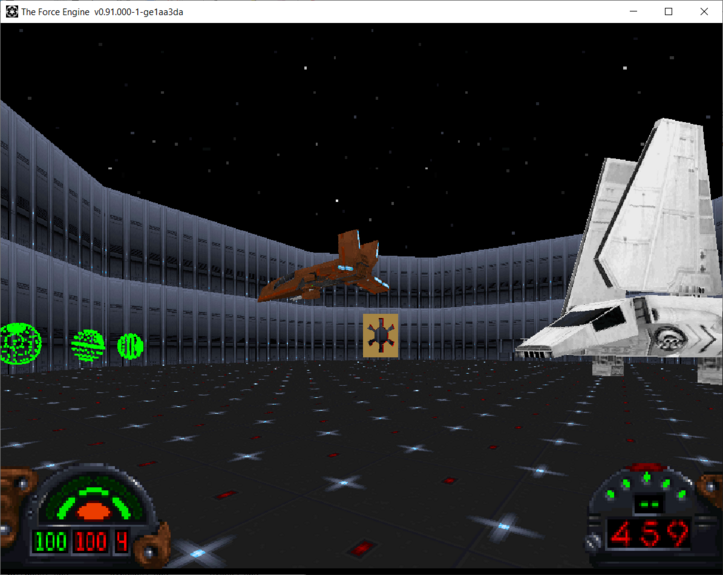
3D Objects are files of type .3DO and belong inside the DARK.GOB container. They are of type 3D and are obviously fully 3D rendered objects. In fact, JEDI has TWO rendering engines. One to render the geometry and one to render the 3D objects.
One big difference in the 3D rendering is that 3D Objects do no hot have any physicality. This means that you can walk through them at any time, unlike lets say a stormtrooper or a wall decoration. Additionally, you can assign animations to them as you can see in the looping Moldy Crow ahead of you.
To select a different 3D Object simply double click on the Name field in the Object Editor. Make sure the class is 3D.
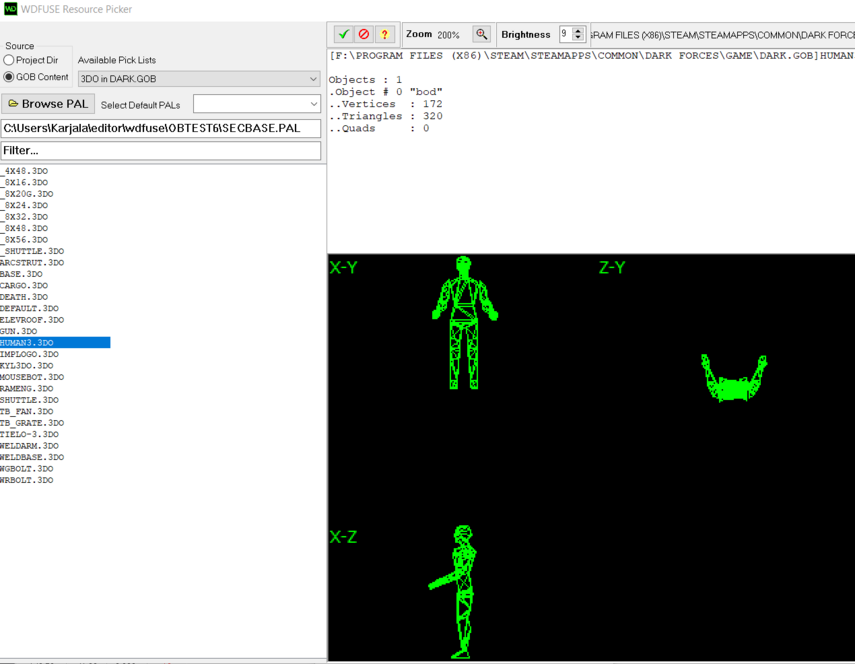
The 3D Resource Picker will attempt to render the object in a wireframe. You can select it from the list and commit when you are happy with your choice.
VUEs
Go ahead and select the Moldy Crow object in the middle of the sector. Notice that there is an animation being played on a loop. The 3D animations of Dark Forces are stored in .VUE files and reside inside the DARK.GOB container.
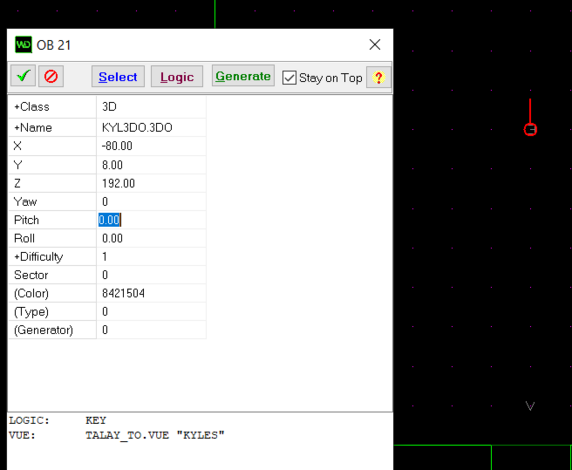
You can see that the 3D object has a VUE called TALAY_TO.VUE "KYLES" . This is the animation you see in the Talay mission. To see what other vues exist just load up the mission and see what is being used by the Moldy Crow.
The VUE is a sequence of points that the 3D object must traverse. It is critical to understand that the VUEs (unfortunately) have hardcoded X,Y,Z positions. It means that the VUE WILL NOT PLAY FROM THE POSITION OF THE OBJECT but instead will always play the points that are defined in the VUE. There are tools to create new VUE offsets but this will be explained at a different time.
The LOGIC: KEY is required for the 3DO to execute animations. Otherwise it will be just render where it is placed even if the VUE is defined.
Axis Rotation
Lets look at the four 3D objects on the bottom right. They are the four HUMAN renderings you remember from the Robotics Facility mission.
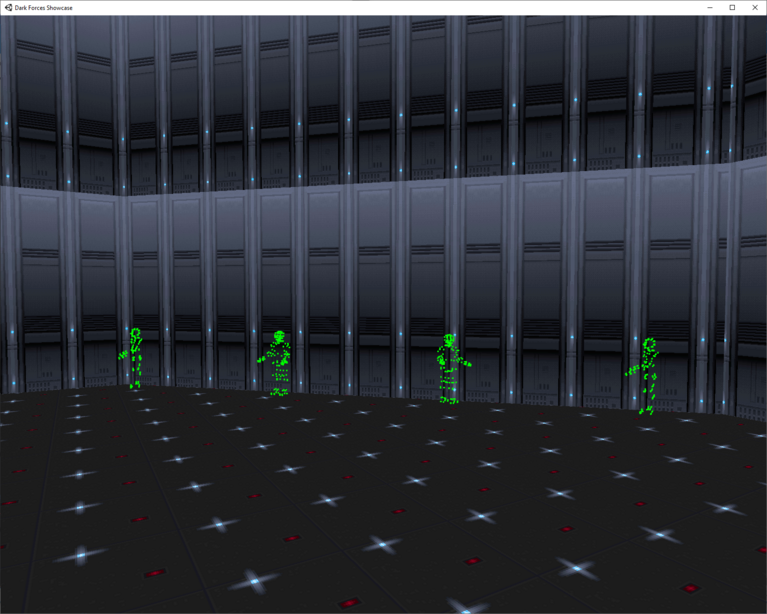
Notice that they are all spinning at different rates. Lets look at the Logic of these objects.
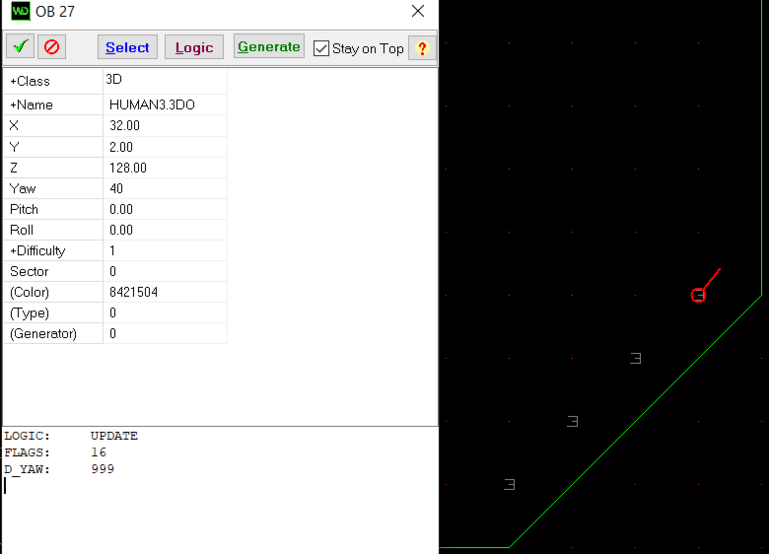
Here we tell the object that it has to update the animation by giving it the LOGIC: UPDATE parameter. The FLAG is set to 16 which maps to the YAW rotation and the D_YAW value is 999 which tells it to spin at speed 999 along the YAW of the object.
Lets take a look at the three Death Star 3D objects on the left to better understand the flags.
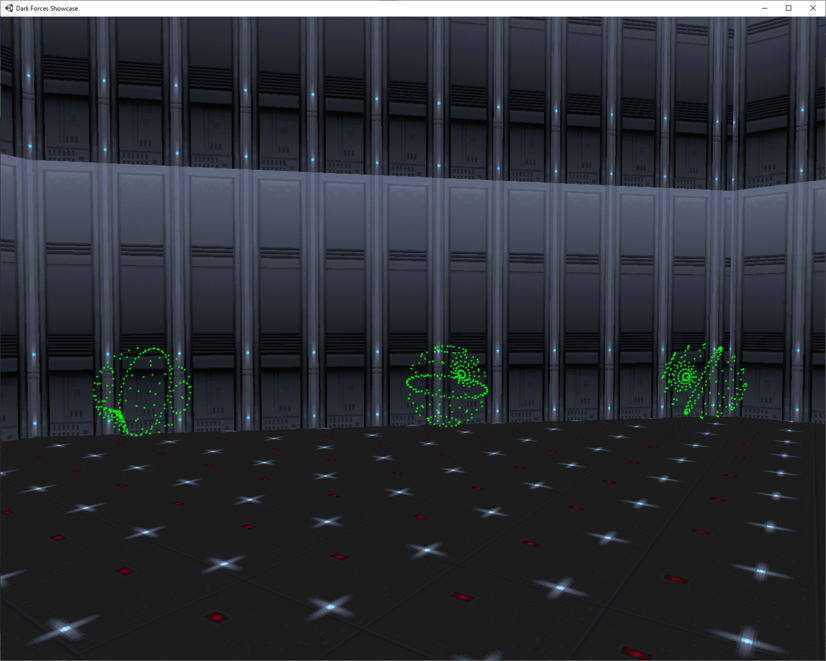
Notice that all three of them spin along different axis. Lets look at their logic.
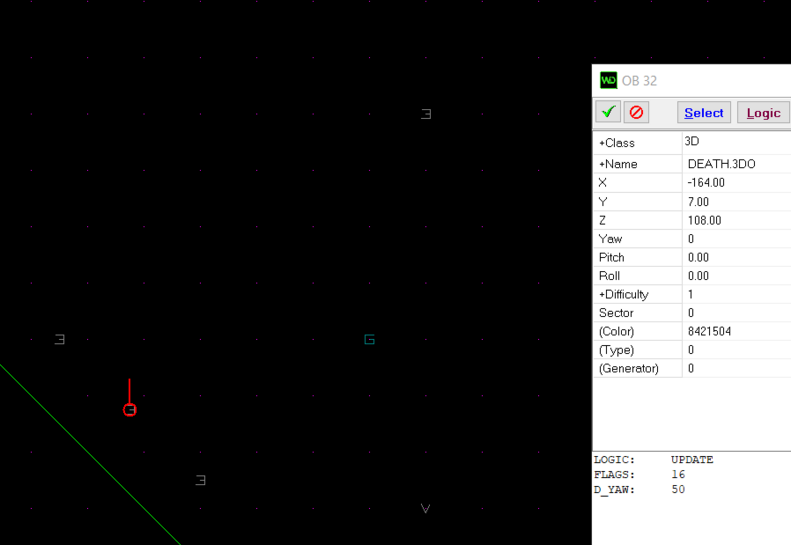
Each one is updated with the LOGIC: UPDATE command.
Every one of them also has the FLAGS section. Each flag is a combination of numbers 8 16 and 32 which correspond to the Pitch , Yaw and Roll axis rotations. The D_(AxisName) values just specify the speed of the rotation.
You can combine the flag rotations and make something spin along a completely arbitrary axis. Choose the left-most Death Star and lets make it spin on a new axis.
Set the Flags to 24 (Combining Pitch and Yaw) and add the D_YAW variable and set the speed to 200.
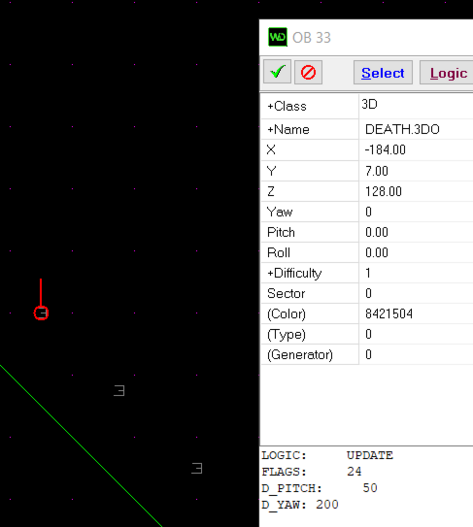
If you look at the 3Ds in the renderer you will notice that the death star you've changed now spins on a completely new axis.
3D Logics
Lets look along the western wall and go to the mousebot object in the little room.
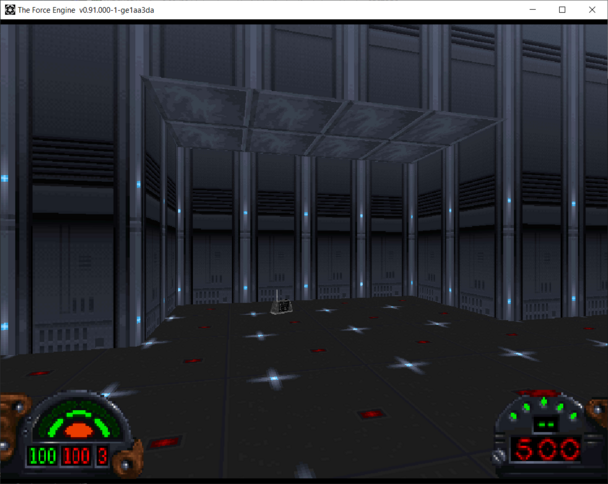
Here you see the little mousebot. It's a 3D object but it has logic assigned to it that makes an NPC.
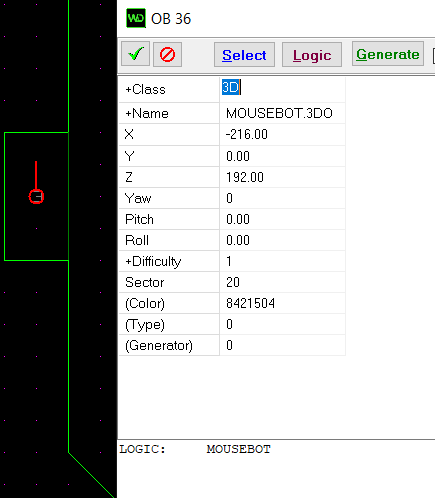
The logic here is LOGIC: MOUSEBOT. This tells the object that it must animate and move around like a mouse robot. The logic does not follow standard VUE animations and they are calculated on the fly.
The interesting thing is that you can assign the mousebot logic to any object want. Even Stormtroopers!
Lets look at the turret by the north wall. Don't worry, the logic is turned off and it cannot fire upon you.
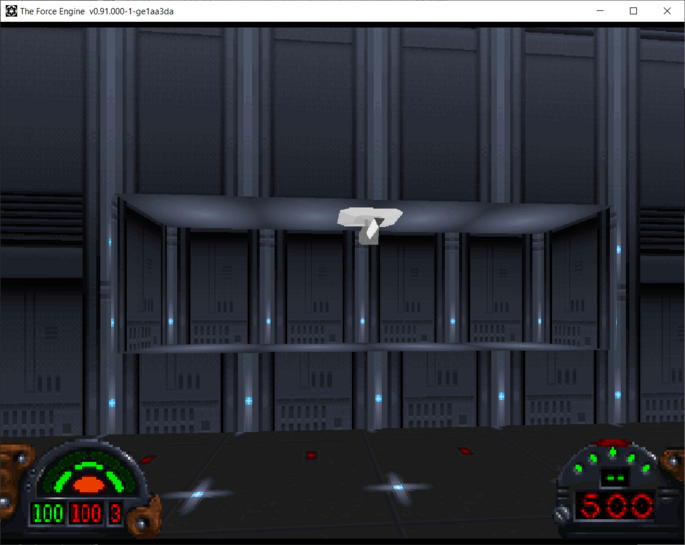
One thing you may notice is that this is not a single 3D object. There are actually two. The base is BASE.3DO while the turret itself is called GUN.3DO.
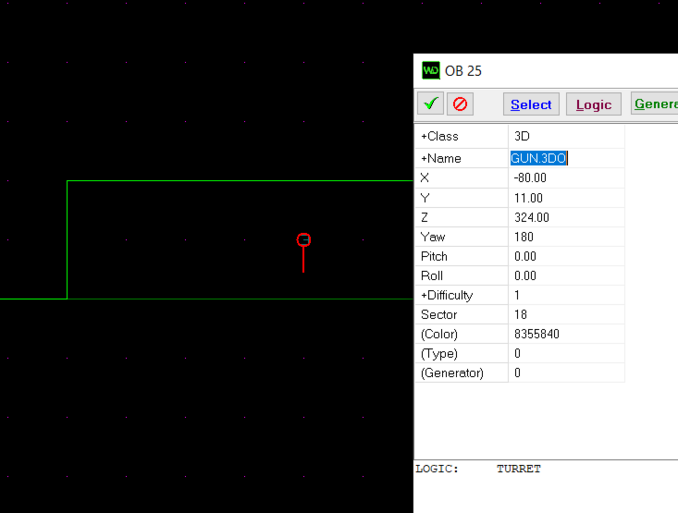
Now click the Logic button for the gun and it will give the LOGIC: TURRET. This 3D object will stay in place and shoot at you. Give it a try by turning it on and then GOBbing the map. Do note, this logic cannot be combined with others like MOUSEBOT or placed into Sprites like a stormtrooper. What a shame.
One more thing about turrets. Because they are attached to the ceiling you may want to choose Object Layer mode to "Ceiling" or "No Snapping" when you are moving them across the map.
3D Physicality and Spirits
Lets walk towards the large Lambda shuttle in the corner.
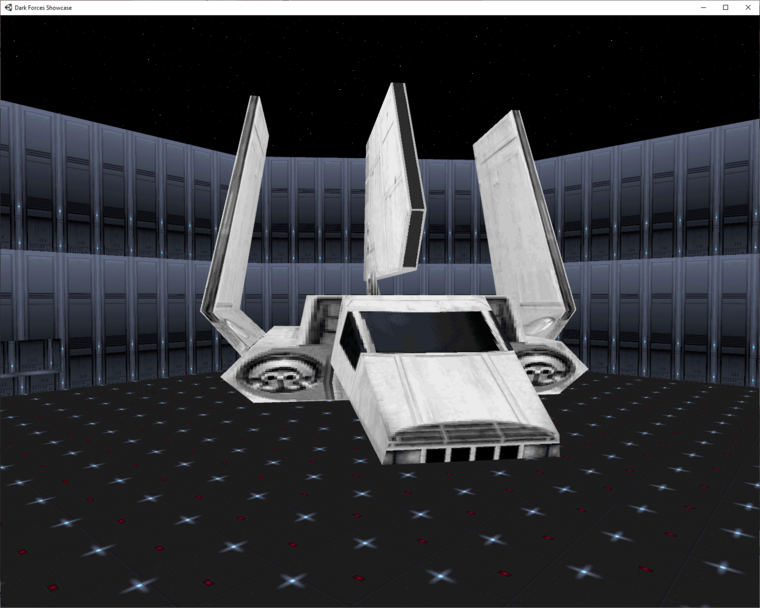
You will notice that you can walk right through it. Remember, 3D objects do not have any physicality! This means that you can always walk through them and that ruins the realism.
Now walk to the left side of the map where there is a 3D Imperial Symbol.
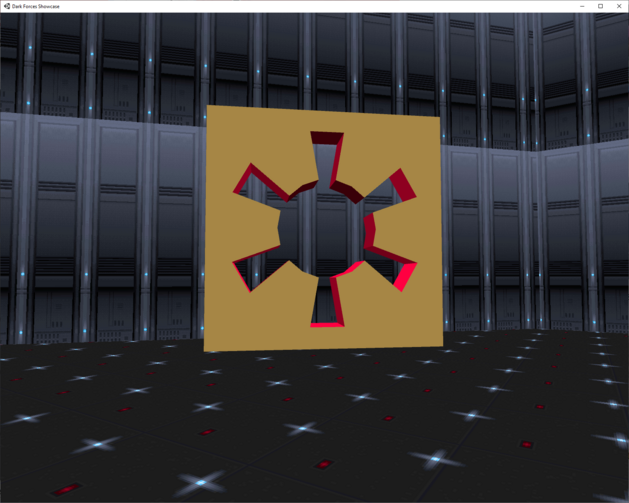
Try walking through it. You can't right? It doesn't mean that suddenly Dark Forces has a 3D physicality renderer but rather it is cheating by creating impassible objects called Spirits with radius logic.
Click on the SPIRIT object and look at the logic. They are "X" shaped objects on the map.
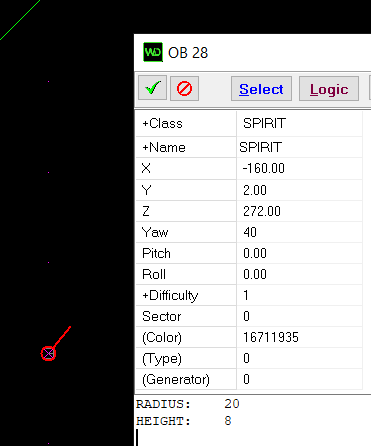
Notice it has two values. RADIUS which is the radius that surrounds the objects through which you cannot pass and also the HEIGHT of the radius (so you can't just jump over it). The height is set to 8 because it is too high for Kyle to jump over. With these spirit objects you can block off any passage in the game.
Try this. Make many new spirit objects with radiuses and try to block all passage through the Lambda shuttle. Make it so you cannot clip through it anymore. If you are confused how that is done. go look at the Lambda shuttle in the mission Arc Hammer. It is done exactly the same way!
Well that's enough about objects. Now lets go for the fun part of Dark Forces. Lets look at INF Scripting.