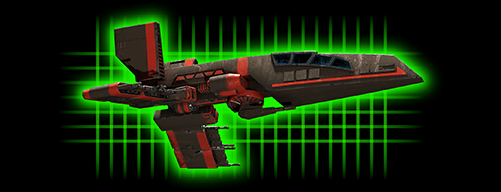


F O R T R E S S Q U A D R I G O N
WALKTHROUGH
This is the walkthrough for the Dark Forces add-on mission Among the Shadows: Fortress Quadrigon. After releasing the mission back in 2002, I've received numerous questions about the walkthrough, especially about the puzzles, so I hope this will help.
Before we start, just a few instructions. Throughout the text you will notice many places being defined through X/Z (in DF world north-south/west-east) coordinates. To see your own coordinates, during the gameplay use the cheat LADATA (just type the word), and your coordinates should constantly be displayed at the top of the screen. The coordinates I mention are the X and Z, respectively. The Y value is the altitude, however I will omit it in the walkthrough as it's mostly not important (the level is not stacked so there is little chance of confusion). Besides, the directions I refer to (north, south, west, etc.) are relative to the map - you can see it by hitting TAB (default) during the game. This walkthrough covers only the places the player must visit to finish the game as it was originally intended. However, there are many extra areas you can explore on your own that are not crucial for finishing the level. All the secrets are written in blue - you can skip them if you want.
PART 1: Outskirts
You start during the night, next to your landspeeder. Take the passage to west/northwest (watch out, there is a deadly chasm on the right side at one point) until you reach the sector at -531,-286. Then go northeast until you reach a small platform at -505,-195. Pass the jumping sequence leading east until you reach the upper lake, above the waterfall. Then, careful not to fall down the waterfall, go north and jump on the platform at -400,-87. Head west through another jumping sequence until you reach the final platform, at -470,-103. Head north through the passageway which follows it.
Secret 1: Instead of jumping the sequence from the platform at -505,-195, jump down in the river and head north through the water. Try to fall down the waterfall at the -567,84 point (northest possible), but slow yourself down as much as you can during the last moments, by walking against the stream direction. If you fall slow enough, you should land on a small shelf. It leads north to a small door and a chamber where you will find a solitary and friendly Gran, a Jeron fusion cutter and tons of ammunition. You can use the elevator to proceed.
Watch out as there are a few enemies roaming the area. Go through the area and reach -570,35, from where you should head north and reach a small water treatment plant. Enter it and kill the enemies inside - one of them should be an officer from who you will take the imperial officer outfit, ID card and a base key. Get back and head east through the passageway at -430,18 to reach the southern hangar of the fortress.
You can't use the elevator at -357,113 as it requires the black key which doesn't at all exist in the game and is only introduced to distract the player. You should go to -200,175 instead and enter a small cave leading south, upwards. When you reach its end, you will see the fortress platform ahead and below you. From here you can safely jump on it. Unlock and open the small door to the north to enter the fortress. You don't need weapons now, you are disguised as an imperial officer and the imperials will not attack you.
PART 2: Disguised
Head north until you reach the control room of the landing platform at -287,178.
Secret 2: Instead of going north to the hangar, head east to enter the restroom. Destroy the rightmost pissoir at -260,168 with an explosive ammunition of your choice to reveal a switch behind it. Push it to open a small vent in the room corner, at -257,158. Go through it to a secret room where you can fetch an assault cannon and see the Easter egg author photo. Shoot Fish to have some fun with landmines.
In the control room, head east and then north to the landing platform and get through its only door to the east. Behind is an elevator and another control room. On the opposite side of the entry passage you will find a machine with the switch with which you can open the northern door of the platform area. Before you go through it, you can enter the landed shuttle through its northern leg and extender to fetch some goodies (especially the night vision goggles) from the inside.
Now go west and then north to the control center at -358,412. Don't worry, the ceiling cannon will not fire at you. Now go east and take the cargo elevator, proceed east until you reach the central square (large circular-ringlike room). Head south and upstairs to enter the night club Defender at -184,225. Once inside, head east up the stairs and meet major Briel Kart, standing alone at the bar table, at -70,168. After a short chat, he will send you downstairs to collect the power zone key from the barman. He will wait for you with the key at -187,130. Now you can get back to the central square.
Secret 3: Destroy the plate raised a few meters from the ground in the central column, at -94,436. The tunnel will appear behind, and you can reach it by jumping on the bulletin board ahead of it first. Inside you will find an extra life.
Take the elevator at -120,447, then continue south and east, pass one door with a switch until you reach the elevator at -47,292 that will take you down when its switch on the column is hit. When you are down, shoot the switch at -22,322 to call the elevator next to you, at -10,290. Get on it and send it back up (with you) by shooting the switch again. Once you are up, enter the control room. You will find one switch among the controls that you can hit.
Secret 4: Besides that switch, there is another pushable control at 16,311. After pushed, it will activate a column-elevator at -47,305 that you can jump on via the bridge that leads to the switch at -22,322. The bridge can take you down to the bottom of this zone, from where you can easily collect the items in the small alcove at -33,330. You can return the same way, jumping on the small bridge when you are high enough again.
Get back down (this time the elevator switch is right here on the wall), and now you will notice that the door leading south at -40,280 is open. Go through and then long way east until you reach the entrance to the power zone.
Secret 5: Stand at 117,240, just next to the fence, and look west/southwest and maximally down (push Page Up with default controls). You should notice a shootable switch on the bottom of the sector. Shoot it to shift the column right next to you, at 120,255, that will bring two extra lives.
Insert the power zone key at 136,274. The machine will ask you for a handprint that you can give just next to it, at 152,274. The computer will recognize your handprint as hostile and be prepared as the nearby enemies will attack you right away. Your cover is now blown.
Part 3: Power zone blues
After you have killed the enemies, the door to the power zone will still be closed. Destroy its handprint switch at 152,274 to open the massive door and enter the Power zone. Prepare for a shootout. Take the small elevator to the middle platform with seats and controls. Completely east, at 267,265, crouch to find the switch that will open the door leading further east. Warning, there is a ceiling cannon at 294,266 that will easily hit you when approaching if you are not careful.
After passing through the newly opened door, head north. The last few meters of the passageway is the elevator that will start taking you down as soon as you step on it. When that happens, immediately jump forward to land on the large cylinder water tank, approximately at 308,324. You can, of course, first go all the way down and clear all the enemies, then return to perform this jump peacefully. From the top of the tank, descend to the small shelf to the east and hit the switch at 341,333 which will open the tank. Get down, return to the elevator you've jumped from, and jump again on the tank. This time you can just drop down the newly opened hole at 315,334. Once you are in the water, go west to reach the outer cylinder, then southeast until you reach the elevator at 328,268. Go up with it, and then south. Warning, when you open the door, there will be a cannon, together with a couple of enemies, at the crossing at 327,227.
At the crossing, first take the passage leading east. Close to the end, on the northern wall of electronics, there is one block (Blade server?) that can be pulled out. You can easily recognize it as it is yellow on the map, in comparison to the others that are green. After you've pulled it out, hit the switch on it and run back to the crossing and then south, as the door at 324,210 will open for a brief time, just enough to reach it. But don't worry if you don't succeed the first time, you can try again. In this southern room kill all the officers - the black one should carry the key to the computer center. Collect it, return north to the crossing (327,227) and now head west to the stairs and then south. The passage ends with a locked door, however you can get into the vent at 290,184 (crouch!) that will lead you to another computer room, through which you can head north back to the power zone control room. Now head east again, however this time completely east until you reach the elevator at 437,256 - you have to call it first. Use it to go down. In the new area, there is a black officer standing in the small room at 482,291. Kill him to collect the code card 5. At the same coordinates you can crouch at the controls and hit the switch to unlock the reactor zone door. However ignore it for now and return into the elevator, back to the power zone control room. Get back west - if the power zone gate is closed meanwhile, take the small stairs and hit the switch at 274,288. Proceed westwards, back out of the power zone.
Part 4: Complicating everything
Get back up via the elevator -37,292, west and north until you reach the circular area. Now you can take the door to the east to reach the computer center. Warning, there will meanwhile be some enemies spawned through the area, and the computer center itself is also swarming with enemies. Fight your way through and take the stairs down at -24,423 to get into the room below.
Kill all the enemies and enter the code you have collected on the code key 5 into the panel at 0,439. When the code is entered, it should raise a control switch from the ground at 3,469. Use it to lower the shields on the column ahead of you, whose switch you can now hit to reveal the codetable on the wall at 30,549. Contrary to the first idea, the small arrows don't point at the letters directly, but define two columns and two lines. The key letters are at their four intersections, and therefore the key letters are W, E, S and T, respectively. At least easy to remember, right?
Get back up, west, south, east, all the way back to the power zone, then down the elevator to the reactor zone. Open the reactor zone door (you should have unlocked it already) and enter the code WEST in the controls at 503,277. It will reveal the switch behind you at 203,244 that will drop the large shields leading further. Take the passage leading southeast.
In the circular reactor area, be careful during the shooting as there are many power reactors (barrels) that explode and can seriously harm you. Enter the small alcove to the east to collect the imperial repeater and hit the switch at 585,194 that will raise the bridge and open the door at 541,170 through which you can now enter the innermost core of the reactor. Get there and turn off the reactor cooling system at 539,188. The emergency door at 530,143 will open, follow the passageway behind, have a brief encounter with your target officer and the explosion will push you down in yet another vent. Follow it until you reach the door at 404,-15 which can be open.
Get out through it, but be very careful as the rocky shelf is very narrow. Head west into the small cave. Warning - there is a landmine at 345,-22 and the best way to get rid of it is the thermal detonator. At the end of the shelf drop down into a small sector with tables, proceed west through a mini-warehouse and then to a slightly larger room. Hit the switch at 257,-44. It will open the door leading to the elevator, but also release the Dark Trooper Phase 1 behind you. Destroy him and call the elevator that was behind the open door near to the switch. Use it to go up, then open the door to the south, and follow the short way through the rocks to find the speeder bike you can use to escape and finish the mission.
Weird details
-
Some enthusiasts have asked me what is the purpose of the weird poster just slightly above the water, at -417,-190. Turn it upside down and you can then read in a Chinese-like script: "Deep dive may not be deadly if done carefully and to north". So - a certain hint to the secret No.1.
-
The music loop hearable in the night club Defender is taken from Groove is in the heart, performed by Deee-Lite, released in 1992.
-
There are many doors that serve only for decorational purposes and can't be open, although they are deliberately marked as yellow on the map. There are some doors as well that require some weird keys that cannot be collected in the game (e.g. Black key). And, the cantina, medical quarters and recycling plant cannot be entered (at the main square).
-
Curiosity: The room at -190,250, where you have to open the northern door of the landing platform where the shuttle is, was the first room I ever made for Dark Forces. I used to fool around with it to check out how to deal with textures, and it remained as the level was built around it. I just wanted to try editing a bit after seeing what spectacular stuff can be done - I had played Mt.Kurek just before.
-
It took me about 6 months to make the level. I think I invested about 700 hours of work on it.
-
In the beta version the night club Defender has had a functional bowling track, however I decided to throw it out just before the release. I though it would seem too silly for the Empire. Already the concept of a night club with boozing imperial personnel was critical enough.
-
The original plot was not to kill, but to kidnap Leyron Arqal, who would be later accidentally shot near the end by an imperial sniper. However I found that a bit too complicated for my INF/VUE knowledge. Also, originally Kyle came to the start position with a jetpack, but I realized such an approach has terrible consistency problems.
I hope this walkthrough was of help. If you have any extra questions, feel free to contact me at oton.ribic @ gmail.com.
-Fish, 2005