Dark Forces uses a 3D Engine called JEDI which renders each of the missions in the game. The missions, and all the accompanying assets, are stored in files called GOBs which are compressed containers like a zip file. WDFUSE is the mission editor that is able to modify the components listed below .
Dark Forces Level Components
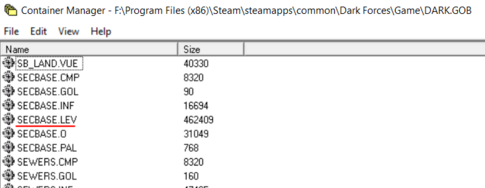
( Note: A handy tool to inspect the GOB files is called CONMAN and you can get it here )
The main GOB files are...
- DARK.GOB - Stores all the main mission data including the level geometry. Some of the files inside the GOB are described below.
- LEV files store the raw level geometry (all the rooms, the walls and their textures)
- O files store all the objects (enemies, items etc..)
- INF files contain all the game scripting logic (Ex: how to move to an elevator or open a door)
- GOL files store all the mission goals (Ex: Find the Death Star Plans)
- CMP files store the colormap mapping (Ex: How lighting affects textures)
- PAL files store the available colors in the mission. You are limited to 256 colors.
- 3DO files store all the true 3D geometry such as platforms or Kyle's ship
- SPRITES.GOB - Stores all the enemy and item objects files.
- WAX files store all the animated enemies and items like stormtroopers or shield pick-ups.
- FME files are non-animated decorations and items such as the blaster rifle
- SOUNDS.GOB - Containers all the sound effects and music for the game.
- VOC files are all the sound effects such as stormtrooper blaster shots or elevator hums.
- GMD files are the mission soundtracks.
- TEXTURES.GOB - Contains all the textures for the game.
- BM files store the texture assets for Dark Forces.
When making missions with WDFUSE you will be mostly working with LEV O and INF files. Lets go into more details about each of these components
LEV Files
Each of the Dark Forces missions' geometry is stored in a LEV file. For example, Secret Base is stored in SECBASE.LEV and the Arc Hammer is stored in ARC.LEV.

The LEVel geometry itself is made out of rooms, called Sectors. The more sectors you have, the more rooms the mission will have. For example, the small mission Secret Base has 218 sectors while the Arc Hammer has 409.
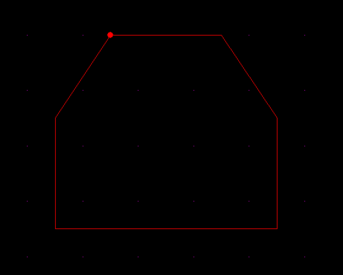
Since this is not a true 3D game, the sectors themselves are basically an outline of a room and an accompanying height. All the walls in this game are perpendicular to the floor and you can never have any slopes. Here is an example of a sector with six walls.

Each sector includes various information like the number of walls it has, the X, Y and Z coordinates of the vertices (points), the height of the floor and ceiling, the textures assigned to it, the amount of lighting and what map layer it belongs on.
O Files
The Object file stores all objects present in the mission. For example, the objects for The Secret Base are stored in SECBASE.O. Each object contains details such as X Y and Z coordinates, the direction it is facing, the type of the object (whether an enemy or an item) and the difficulty.
INF Files
The INFormation files store all the scripting logic for the mission. For example, the scripting logic for The Secret Base are stored in SECBASE.INF. These files contain details such as how to open a door, move an elevator and when to complete a mission. Each INF script is mapped to a Sector of one of the Sector's Walls. This means that all the missions have a separate sectors that all they do is to tell the mission when to finish .
Now that you understand the file structure lets get into WDFUSE Configuration.
WDFUSE Tutorials
- Introduction
- WDFUSE Tutorial - Configuration
- WDFUSE Tutorial - Basic Geometry
- WDFUSE Tutorial - Basic Geometry II
- WDFUSE Tutorial - 3D Renderer
- WDFUSE Tutorial - Advanced Geometry
- WDFUSE Tutorial - Advanced Geometry II
- WDFUSE Tutorial - Advanced Geometry III
- WDFUSE Tutorial - Objects
- WDFUSE Tutorial - Scripting
- WDFUSE Tutorial - Scripting II
- WDFUSE Tutorial - Scripting III