No edit summary |
No edit summary |
||
| (2 intermediate revisions by the same user not shown) | |||
| Line 1: | Line 1: | ||
== 3D Renderer == | == 3D Renderer == | ||
One of the key WDFUSE features that has been missing since launch was a full 3D preview of your current mission. However, by 2022, one of the community members '''The-MAZZTer''' has created a Unity-based [https://github.com/The-MAZZTer/DarkForces Dark Forces Showcase] that allows for full 3D preview of a Dark Forces mission . | One of the key WDFUSE features that has been missing since launch was a full 3D preview of your current mission. However, by 2022, one of the community members '''The-MAZZTer''' has created a Unity-based [https://github.com/The-MAZZTer/DarkForces Dark Forces Showcase] that allows for full 3D preview of a Dark Forces mission . | ||
[[File:Showcase preview.png| | [[File:Showcase preview.png|thumb|thumb|1035x1035px|center]] | ||
| Line 8: | Line 8: | ||
=== Renderer Install and Configuration === | === Renderer Install and Configuration === | ||
The renderer does not come bundled with WDFUSE but it can be instantly installed and auto-configured through the game's '''Options''' menu. To get started either click the '''Options''' icon in the main menu bar at the top or press '''F9''' . | The renderer does not come bundled with WDFUSE but it can be instantly installed and auto-configured through the game's '''Options''' menu. To get started either click the '''Options''' icon in the main menu bar at the top or press '''F9''' . | ||
[[File:Options Bar.png| | [[File:Options Bar.png|thumb|thumb|340x340px|center]] | ||
Switch to the 3D Renderer Tab and click '''Download''' on the right hand side. It should take a few seconds to download and auto-configure the renderer. Otherwise, if you already have downloaded it simply Browse to the path where the executable '''Dark Forces Showcase.exe''' is located. | Switch to the 3D Renderer Tab and click <span style="color:#FF0000">'''<big>Download</big>'''</span> on the right hand side (''The actual picture of the Moldy Crow wit the word '''download'''''). It should take a few seconds to download and auto-configure the renderer. Otherwise, if you already have downloaded it simply Browse to the path where the executable '''Dark Forces Showcase.exe''' is located. | ||
[[File:RendererOptions.png| | [[File:RendererOptions.png|thumb|thumb|843x843px|center]] | ||
| Line 26: | Line 26: | ||
=== Using 3D Renderer === | === Using 3D Renderer === | ||
To start viewing your mission in 3D press the red '''3D Render''' button at the main menu or press the '''F7''' key. A new window will appear showing your mission. If you still have the original square from the Basics tutorial you will see it rendered in 3D. | To start viewing your mission in 3D press the red '''3D Render''' button at the main menu or press the '''F7''' key. A new window will appear showing your mission. If you still have the original square from the Basics tutorial you will see it rendered in 3D. | ||
[[File:Render Square.png| | [[File:Render Square.png|thumb|thumb|826x826px|center]] | ||
You can move around the 3D world using the typical FPS '''WASD''' controls and aim with your mouse. | You can move around the 3D world using the typical FPS '''WASD''' controls and aim with your mouse. | ||
| Line 36: | Line 36: | ||
=== Renderer Options === | === Renderer Options === | ||
If you press '''Escape''' in the 3D renderer you will see various options. | If you press '''Escape''' in the 3D renderer you will see various options. | ||
[[File:InRendererOptions.png| | [[File:InRendererOptions.png|thumb|thumb|857x857px|center]] | ||
Here you can modify... | Here you can modify... | ||
| Line 50: | Line 50: | ||
* Whether to show warnings when loading ('''Recommended: Off)''' | * Whether to show warnings when loading ('''Recommended: Off)''' | ||
* Camera position displayed in X, Y, Z coordinates ('''Recommended: On);''' | * Camera position displayed in X, Y, Z coordinates ('''Recommended: On);''' | ||
[[File:RenderPos.png| | [[File:RenderPos.png|thumb|thumb|367x367px|center]] | ||
'''Note''': Your settings are stored in the registry (including the width and height of your window). | '''Note''': Your settings are stored in the registry (including the width and height of your window). | ||
[[File:Registry Key.png| | [[File:Registry Key.png|thumb|thumb|1058x1058px|center]] | ||
'''Advanced:''' Search for this key '''Computer\HKEY_USERS\<Your Windows User Key>SOFTWARE\MZZT\Dark Forces Showcase''' and delete values as you feel necessary. | '''Advanced:''' Search for this key '''Computer\HKEY_USERS\<Your Windows User Key>SOFTWARE\MZZT\Dark Forces Showcase''' and delete values as you feel necessary. | ||
Latest revision as of 13:11, 18 March 2024
3D Renderer
One of the key WDFUSE features that has been missing since launch was a full 3D preview of your current mission. However, by 2022, one of the community members The-MAZZTer has created a Unity-based Dark Forces Showcase that allows for full 3D preview of a Dark Forces mission .
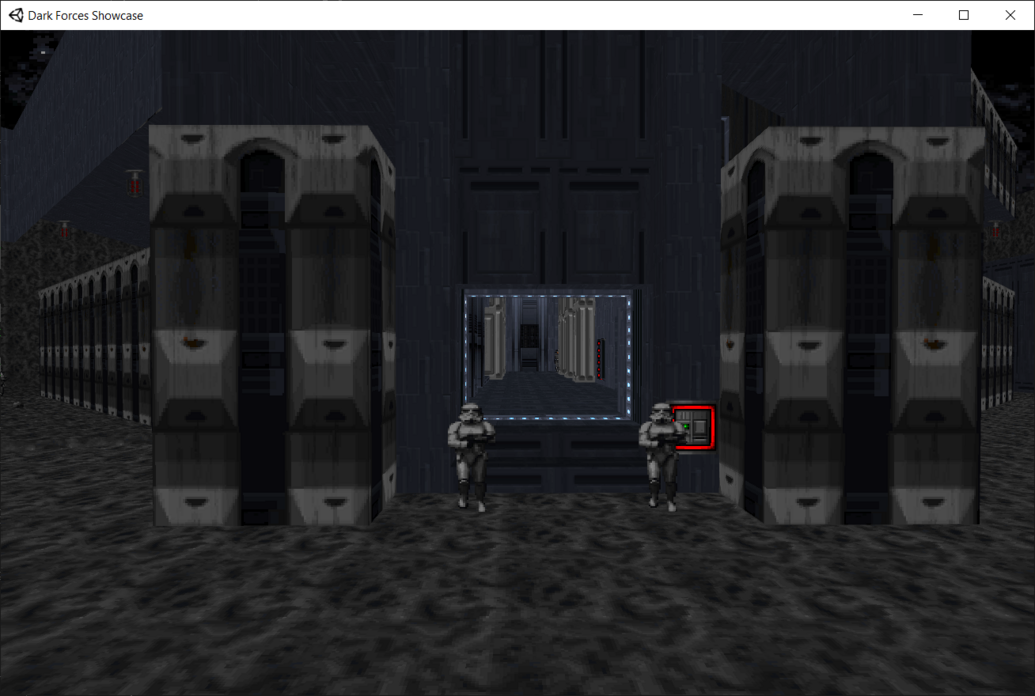
The renderer has been modified by Karjala ( df21.net{ at }gmail.com ) and integrated into WDFUSE to allow full previews of the mission without having the need to launch the game.
Renderer Install and Configuration
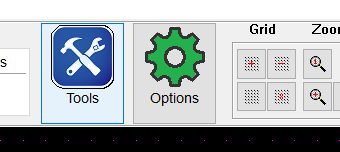
The renderer does not come bundled with WDFUSE but it can be instantly installed and auto-configured through the game's Options menu. To get started either click the Options icon in the main menu bar at the top or press F9 .
Switch to the 3D Renderer Tab and click Download on the right hand side (The actual picture of the Moldy Crow wit the word download). It should take a few seconds to download and auto-configure the renderer. Otherwise, if you already have downloaded it simply Browse to the path where the executable Dark Forces Showcase.exe is located.
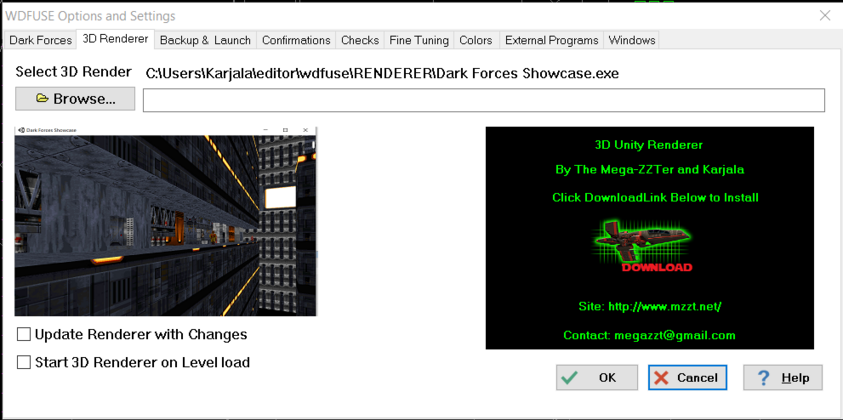
Within a few seconds you will get a pop-up saying that the renderer has been installed.
You will also notice two checkboxes.
- If you check the Update Renderer with Changes it means that any time you make a change in the editor, they will be reflected in the 3D renderer.
- If you check the Start 3D Render on Level Load it means that when you open up a new or existing project the launcher will start automatically.
Click them both and press ok to exit the Options menu.
Using 3D Renderer
To start viewing your mission in 3D press the red 3D Render button at the main menu or press the F7 key. A new window will appear showing your mission. If you still have the original square from the Basics tutorial you will see it rendered in 3D.
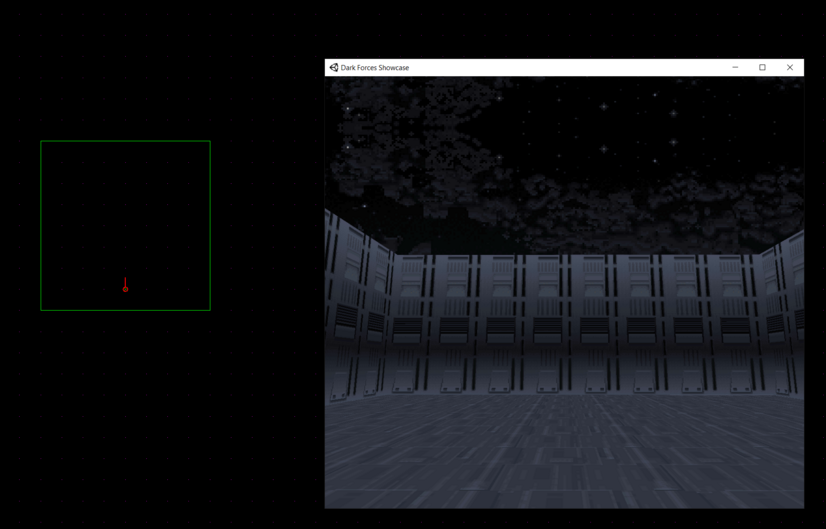
You can move around the 3D world using the typical FPS WASD controls and aim with your mouse.
If you have checked the Update Renderer with Changes checkbox when you move a map component it will be reflected in the 3D preview window. Try moving the map walls or the sector and you will see them get updated in 3D.
Panning:
A very useful feature is you can switch between WDFUSE and the 3D Renderer by holding the ALT button so you can pan the cursor between the two programs. It will halt the camera in the renderer and allows you to control the mouse. Give it a try - you don't need to Alt-Tab between them anymore.
Renderer Options
If you press Escape in the 3D renderer you will see various options.
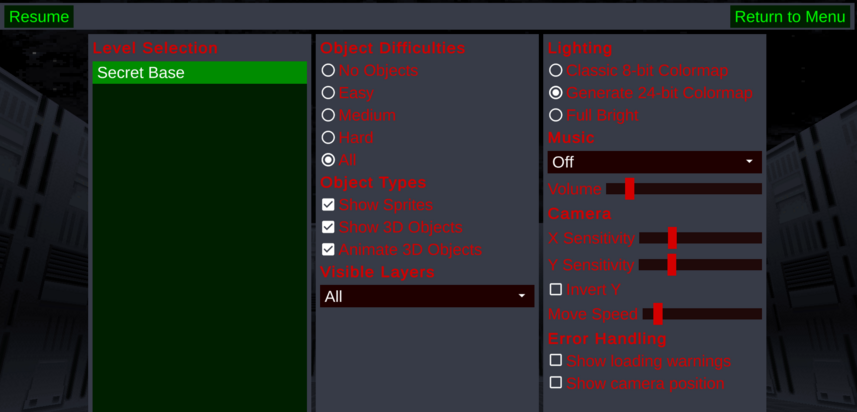
Here you can modify...
- Which object difficulties will be displayed
- Which object types should be displayed
- Which layers must be visible
- What type of lighting can be displayed (Full Bright lighting (Ambient 31) or Dark Forces 8 bit versions
- Music On or Off (Recommended: OFF )
- The Volume of the music
- How sensitive is the X/Y camera as you look around
- Whether to invert the camera
- The speed at which the camera can be moved
- Whether to show warnings when loading (Recommended: Off)
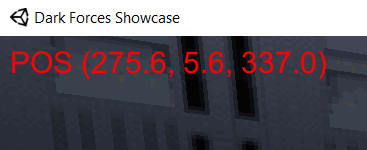
- Camera position displayed in X, Y, Z coordinates (Recommended: On);
Note: Your settings are stored in the registry (including the width and height of your window).
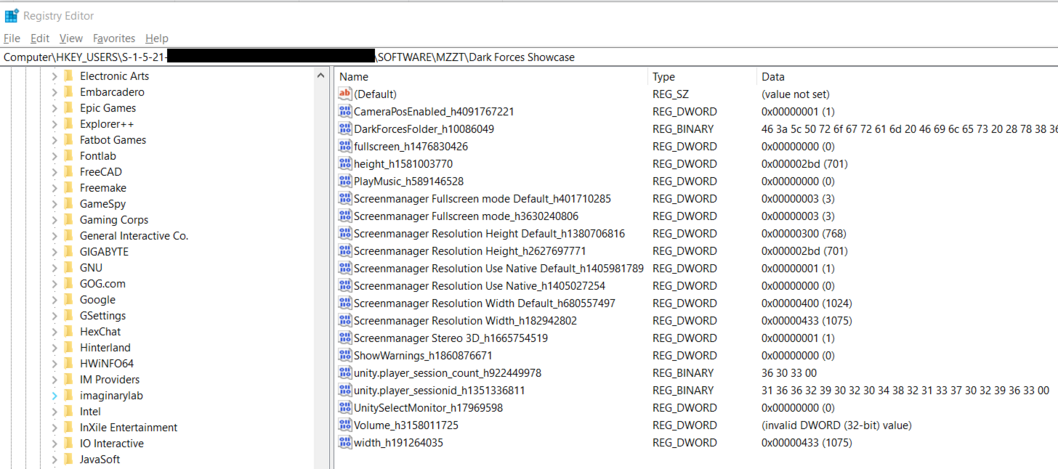
Advanced: Search for this key Computer\HKEY_USERS\<Your Windows User Key>SOFTWARE\MZZT\Dark Forces Showcase and delete values as you feel necessary.
Finally, if the 3D view state ever gets desynchronized from what you see in the editor simply press the 3D Render button again or press F11 to refresh the view.
With that, lets move to Advanced Geometry section.
WDFUSE Tutorials
- Introduction
- WDFUSE Tutorial - Configuration
- WDFUSE Tutorial - Basic Geometry
- WDFUSE Tutorial - Basic Geometry II
- WDFUSE Tutorial - 3D Renderer
- WDFUSE Tutorial - Advanced Geometry
- WDFUSE Tutorial - Advanced Geometry II
- WDFUSE Tutorial - Advanced Geometry III
- WDFUSE Tutorial - Objects
- WDFUSE Tutorial - Scripting
- WDFUSE Tutorial - Scripting II
- WDFUSE Tutorial - Scripting III