No edit summary |
No edit summary |
||
| (3 intermediate revisions by the same user not shown) | |||
| Line 1: | Line 1: | ||
== Scrolling == | == Scrolling == | ||
Let's continue to the hallway at the top where you can learn about scrolling elevators. Every time you see a flowing river or a waterfall; all of it is performed using the scrolling mechanism. | Let's continue to the hallway at the top where you can learn about scrolling elevators. Every time you see a flowing river or a waterfall; all of it is performed using the scrolling mechanism . | ||
=== Scrolling Floors === | === Scrolling Floors === | ||
All flowing water in the game is performed with scrolling floors. Come to the river and take a look. You can hear water flowing. | All flowing water in the game is performed with scrolling floors. Come to the river and take a look. You can hear water flowing. | ||
[[File:WaterFlow.png| | [[File:WaterFlow.png|thumb|thumb|928x928px|center]] | ||
Lets look at the '''WATER''' sector code. You can see that it is a new type of elevator. | Lets look at the '''WATER''' sector code. You can see that it is a new type of elevator. | ||
seq | seq | ||
| Line 18: | Line 18: | ||
=== Scrolling Walls === | === Scrolling Walls === | ||
Continue down the hallway and you will see two walls. The one on the right is scrolling and the one on the left is not. | Continue down the hallway and you will see two walls. The one on the right is scrolling and the one on the left is not. | ||
[[File:ScrollWall1.png| | [[File:ScrollWall1.png|thumb|thumb|970x970px|center]] | ||
Lets look at the code of the sector '''SCROLL.''' It is an elevator class of scroll_wall. | Lets look at the code of the sector '''SCROLL.''' It is an elevator class of scroll_wall. | ||
seq | seq | ||
| Line 30: | Line 30: | ||
You must be wondering, how come the wall on the left is not moving? It's because for a scroll wall to work properly, you would need to apply a specific flag. | You must be wondering, how come the wall on the left is not moving? It's because for a scroll wall to work properly, you would need to apply a specific flag. | ||
[[File:ScrollFlag.png| | [[File:ScrollFlag.png|thumb|thumb|673x673px|center]] | ||
Once the sector is set to be a scroll wall sector you must specify which of the wall sections (TOP / MID / BOT / SIGN ) should scroll. Depending on which you select, they will begin scrolling. To fix the other wall simply change the flag go '''128''' (Scroll Mid). | Once the sector is set to be a scroll wall sector you must specify which of the wall sections (TOP / MID / BOT / SIGN ) should scroll. Depending on which you select, they will begin scrolling. To fix the other wall simply change the flag go '''128''' (Scroll Mid). | ||
Once you fix the other wall you may notice that it scrolls at the same angle as the other one . That's because all the walls always move with the sector's angle command. Lets continue down the hall and around the corner. | Once you fix the other wall you may notice that it scrolls at the same angle as the other one . That's because all the walls always move with the sector's angle command. Lets continue down the hall and around the corner. | ||
[[File:ScrollSign2.png| | [[File:ScrollSign2.png|thumb|thumb|913x913px|center]] | ||
Here you will see a sign that changes between different aurebesh letters. Lets look at the texture first. | Here you will see a sign that changes between different aurebesh letters. Lets look at the texture first. | ||
[[File:AurebeshSign.png| | [[File:AurebeshSign.png|thumb|thumb|713x713px|center]] | ||
You will see that it is a long texture divided into three parts. How does Dark Forces render it? Click on the '''SIGN''' sector code. | You will see that it is a long texture divided into three parts. How does Dark Forces render it? Click on the '''SIGN''' sector code. | ||
seq | seq | ||
| Line 53: | Line 53: | ||
To prove that we are just scrolling the texture. Change the floor altitude of the sector to 0 and change the height to 16. Now you can see that the scroll_wall sector just changes the texture offsets as it scrolls. | To prove that we are just scrolling the texture. Change the floor altitude of the sector to 0 and change the height to 16. Now you can see that the scroll_wall sector just changes the texture offsets as it scrolls. | ||
[[File:FullScrollSign.png| | [[File:FullScrollSign.png|thumb|thumb|680x680px|center]] | ||
== Lights == | == Lights == | ||
You are already familiar that you can change sector or wall ambient lighting. You can also change them using an elevator. Go around the corner and look at the hallway with the changing lights. | You are already familiar that you can change sector or wall ambient lighting. You can also change them using an elevator. Go around the corner and look at the hallway with the changing lights. | ||
[[File:ChangeLight.png| | [[File:ChangeLight.png|thumb|thumb|746x746px|center]] | ||
This is a simple elevator. If you look at the code you will see that the '''elevator change_light''' just has stops that define the value of the light used by the sector. | This is a simple elevator. If you look at the code you will see that the '''elevator change_light''' just has stops that define the value of the light used by the sector. | ||
seq | seq | ||
| Line 68: | Line 68: | ||
== Morphing Elevators == | == Morphing Elevators == | ||
Go around the corner and look at this large room with multiple moving shapes, | Go around the corner and look at this large room with multiple moving shapes, | ||
[[File:Morph Shapes.png| | [[File:Morph Shapes.png|thumb|thumb|1026x1026px|center]]Not everything in Dark Forces only moves up or down. Here you will see a lot of moving shapes that are utilizing the morph and spin elevators. | ||
=== Morph Elevators === | === Morph Elevators === | ||
You will see two crates that are slowly moving by themselves. They are two subsectors that start on the right hand of the sector and move back and forth. If you stand in their way they will stop. You can also climb on them. | You will see two crates that are slowly moving by themselves. They are two subsectors that start on the right hand of the sector and move back and forth. If you stand in their way they will stop. You can also climb on them. | ||
[[File:Crates2.png| | [[File:Crates2.png|thumb|thumb|996x996px|center]] | ||
Lets look at the top sector's INF script called '''CRATE .''' | Lets look at the top sector's INF script called '''CRATE .''' | ||
seq | seq | ||
| Line 89: | Line 89: | ||
One important thing you must learn is that when you use morphing sectors the walls also have to move. This is not enabled by default. In order for walls to move (morph) they must be tagged with "'''Wall Morph With Sector'''" flag (32). | One important thing you must learn is that when you use morphing sectors the walls also have to move. This is not enabled by default. In order for walls to move (morph) they must be tagged with "'''Wall Morph With Sector'''" flag (32). | ||
[[File:Morph1.png| | [[File:Morph1.png|thumb|thumb|868x868px|center]] | ||
'''Remember!''' Every wall (inside and outside the subsectors) in this room '''must''' have flag 32 or the morphing sectors will not move. | '''Remember!''' Every wall (inside and outside the subsectors) in this room '''must''' have flag 32 or the morphing sectors will not move. | ||
One interesting thing you may notice is that the top textures are quite different. The texture on the top one is solid-colored and the bottom one has a full texture. You will now learn this is the case. | One interesting thing you may notice is that the top textures are quite different. The texture on the top one is solid-colored and the bottom one has a full texture. You will now learn this is the case. | ||
[[File:TwoCratesOneKyle.png| | [[File:TwoCratesOneKyle.png|thumb|thumb|956x956px|center]] | ||
=== Morph Scroling === | === Morph Scroling === | ||
Look at the second crate called '''CRATE2 .''' On top it has a texture that moves along the elevator. However, you will see that the texture is not tied to the crate as it moves along. That is because by '''default floor textures are not anchored.''' In fact, you cannot anchor floor textures like you can with walls. So what can we do? Because right now the INF code of '''CRATE2''' is identical to '''CRATE''' . | Look at the second crate called '''CRATE2 .''' On top it has a texture that moves along the elevator. However, you will see that the texture is not tied to the crate as it moves along. That is because by '''default floor textures are not anchored.''' In fact, you cannot anchor floor textures like you can with walls. So what can we do? Because right now the INF code of '''CRATE2''' is identical to '''CRATE''' . | ||
[[File:MorphTexture.png| | [[File:MorphTexture.png|thumb|thumb|952x952px|center]] | ||
| Line 120: | Line 120: | ||
Give the above code a try and you will see that the floor texture now flows at the same speed as the crate moves. In Dark Forces, any time you see a texture that moves on the floor it is because it is being scrolled by a scroll_floor elevator. This is how it is done in the ''Detention Center'' moving platform. It is a morph elevator with a scroll_floor texture. | Give the above code a try and you will see that the floor texture now flows at the same speed as the crate moves. In Dark Forces, any time you see a texture that moves on the floor it is because it is being scrolled by a scroll_floor elevator. This is how it is done in the ''Detention Center'' moving platform. It is a morph elevator with a scroll_floor texture. | ||
[[File:DTCMoprh.png| | [[File:DTCMoprh.png|thumb|thumb|785x785px|center]] | ||
The box at the top hides the fact that it is scrolling by using a single color texture. This kind of "workaround" is used by all morphing elevators in the game. | The box at the top hides the fact that it is scrolling by using a single color texture. This kind of "workaround" is used by all morphing elevators in the game. | ||
== Spin Elevators == | == Spin Elevators == | ||
Dark Forces elevators not only move along the X,Y,Z axis but can also spin place. Lets take a look at the triangle-shaped spinning sector called '''SPIN1.''' | Dark Forces elevators not only move along the X,Y,Z axis but can also spin place. Lets take a look at the triangle-shaped spinning sector called '''SPIN1.''' | ||
[[File:SpinTriangle.png| | [[File:SpinTriangle.png|thumb|thumb|871x871px|center]] | ||
As you can see - the triangle shape is spinning in one position. Lets look at the code. | As you can see - the triangle shape is spinning in one position. Lets look at the code. | ||
seq | seq | ||
| Line 134: | Line 134: | ||
seqend | seqend | ||
As you see we are now using an elevator of type '''morph_spin1.''' This type of elevator spins in one place around a position called '''center.''' In this case, you simply specify the X and Z positions of the position the elevator should spin around. The trinagle is spinning around position '''X=-88''' and '''Z=132''' If you ever wonder what position a particular point is at simply look at the map window's position in the bottom left corner. | As you see we are now using an elevator of type '''morph_spin1.''' This type of elevator spins in one place around a position called '''center.''' In this case, you simply specify the X and Z positions of the position the elevator should spin around. The trinagle is spinning around position '''X=-88''' and '''Z=132''' If you ever wonder what position a particular point is at simply look at the map window's position in the bottom left corner. | ||
[[File:XZ positions.png| | [[File:XZ positions.png|thumb|thumb|244x244px|center]] | ||
In this case you are at X=-'''108''' and Z='''264''' | In this case you are at X=-'''108''' and Z='''264''' | ||
| Line 147: | Line 147: | ||
Let's have some fun. Change '''SPIN2''' 's center position to be the same as the triangle position ('''-88, 132''') and run the game. | Let's have some fun. Change '''SPIN2''' 's center position to be the same as the triangle position ('''-88, 132''') and run the game. | ||
[[File:SpinTriangle2.png| | [[File:SpinTriangle2.png|thumb|thumb|560x560px|center]] | ||
Now the hexagon shape spins AROUND the triangle. Neat! | Now the hexagon shape spins AROUND the triangle. Neat! | ||
[[File:HexagonSpin.png| | [[File:HexagonSpin.png|thumb|thumb|897x897px|center]] | ||
=== Morph-Spin Elevators === | === Morph-Spin Elevators === | ||
Now lets look at the the last sector in this room called '''SPIN3 .''' It's a spinning star .... that also MOVES back and forth. | Now lets look at the the last sector in this room called '''SPIN3 .''' It's a spinning star .... that also MOVES back and forth. | ||
[[File:Spin3.png| | [[File:Spin3.png|thumb|thumb|1003x1003px|center]] | ||
Let's look at the code. You can see that this sequence consists of two classes '''morph_move2''' and '''morph_spin1.''' | Let's look at the code. You can see that this sequence consists of two classes '''morph_move2''' and '''morph_spin1.''' | ||
seq | seq | ||
| Line 177: | Line 177: | ||
=== Sounds Effects === | === Sounds Effects === | ||
[[File:TextAndSound.png| | [[File:TextAndSound.png|thumb|thumb|701x701px|center]] | ||
When you enter the one on the left you will hear an alarm sound. Lets look at the code of the '''SOUND''' sector. | When you enter the one on the left you will hear an alarm sound. Lets look at the code of the '''SOUND''' sector. | ||
seq | seq | ||
| Line 196: | Line 196: | ||
=== Text Messages === | === Text Messages === | ||
Now walk over the sector called '''TEXT''' on the right. | Now walk over the sector called '''TEXT''' on the right. | ||
[[File:HelloMapMaker.png| | [[File:HelloMapMaker.png|thumb|thumb|871x871px|center]] | ||
As you walk over it - you will see a text message "'''Hello Map Maker - Great Job'''". Let's look at the code. | As you walk over it - you will see a text message "'''Hello Map Maker - Great Job'''". Let's look at the code. | ||
seq | seq | ||
| Line 206: | Line 206: | ||
All text messages in the game are saved in a file called '''TEXT.MSG'''. You can see it in your project folder. To edit it go to your Main Menu and click on '''View'''-->'''Editors'''-->'''MSG''' | All text messages in the game are saved in a file called '''TEXT.MSG'''. You can see it in your project folder. To edit it go to your Main Menu and click on '''View'''-->'''Editors'''-->'''MSG''' | ||
[[File:MSG.png| | [[File:MSG.png|thumb|thumb|701x701px|center]] | ||
You will see WDFUSE open the text message file editor. You can see that for the value '''350''' we've set it to "'''Hello Map Maker'''" mesage. | You will see WDFUSE open the text message file editor. You can see that for the value '''350''' we've set it to "'''Hello Map Maker'''" mesage. | ||
[[File:TextMessage2.png| | [[File:TextMessage2.png|thumb|thumb|748x748px|center]] | ||
You can change any value to say whatever you want. For example, you could make a map where instead of "'''Death Star Plans'''" you could change it to "'''Dark Forces Source Code'''". In fact... '''do it now'''! | You can change any value to say whatever you want. For example, you could make a map where instead of "'''Death Star Plans'''" you could change it to "'''Dark Forces Source Code'''". In fact... '''do it now'''! | ||
| Line 225: | Line 225: | ||
== Mission Completion == | == Mission Completion == | ||
Go around the corner and you will see the '''Death Star Plans'''. | Go around the corner and you will see the '''Death Star Plans'''. | ||
[[File:Mission Completion.png| | [[File:Mission Completion.png|thumb|thumb|834x834px|center]] | ||
If you pick them up, you will hear an elevator sound moving and receive a '''Mission Objectives Completion''' message (And if you changed the TEXT.MSG file from the previous lesson- it should say "'''WDFUSE Tutorial Completed'''" ). | If you pick them up, you will hear an elevator sound moving and receive a '''Mission Objectives Completion''' message (And if you changed the TEXT.MSG file from the previous lesson- it should say "'''WDFUSE Tutorial Completed'''" ). | ||
[[File:PickUpMsg.png| | [[File:PickUpMsg.png|thumb|thumb|1043x1043px|center]] | ||
How is this done? Open up the map and look at the large C-shaped sector that is called '''COMPLETE.''' | How is this done? Open up the map and look at the large C-shaped sector that is called '''COMPLETE.''' | ||
[[File:Complete1.png| | [[File:Complete1.png|thumb|thumb|752x752px|center]] | ||
This is a unique sector that keeps track of how many steps you have to take until you reach the end of the mission. The sector name must be called '''complete''' otherwise the objective logic will not work. Lets look at the source code. | This is a unique sector that keeps track of how many steps you have to take until you reach the end of the mission. The sector name must be called '''complete''' otherwise the objective logic will not work. Lets look at the source code. | ||
seq | seq | ||
| Line 238: | Line 238: | ||
seqend | seqend | ||
You can see that it is a simple '''move_floor''' elevator. It starts at position 1 and waits there. When it receives a message to go to the next stop it reaches stop #2 and runs the '''complete''' command. When it does, this ends the mission and you will get the "Mission Completed" message. So what tells this sector to move to the next part? It is the LOGIC: PLANS section of the Death Star Plans object. | You can see that it is a simple '''move_floor''' elevator. It starts at position 1 and waits there. When it receives a message to go to the next stop it reaches stop #2 and runs the '''complete''' command. When it does, this ends the mission and you will get the "Mission Completed" message. So what tells this sector to move to the next part? It is the LOGIC: PLANS section of the Death Star Plans object. | ||
[[File:DSPlans.png| | [[File:DSPlans.png|thumb|thumb|731x731px|center]] | ||
But what if you do not want an item to tell the complete elevator to go to the next stop? Well you can do it with triggers! Lets make a few changes. | But what if you do not want an item to tell the complete elevator to go to the next stop? Well you can do it with triggers! Lets make a few changes. | ||
| Line 258: | Line 258: | ||
seqend | seqend | ||
Now when you walk ('''event_mask: 4''') over this sector, it will send a '''next_stop''' message to the elevator '''complete.''' | Now when you walk ('''event_mask: 4''') over this sector, it will send a '''next_stop''' message to the elevator '''complete.''' | ||
[[File:NextStop.png| | [[File:NextStop.png|thumb|thumb|920x920px|center]] | ||
Now run the game. When you walk over the sector '''OBJ''' you will hear the elevator moving to the next stop (it is placed right next to you so you can hear it. In a normal game the '''complete''' sector is usually placed far away). Then when you pick up the '''Death Star Plans''' you will hear the elevator once again moves to the next stop and thus completes the mission. The neat thing here is that the '''complete''' elevator can be treated just like any other - with messages being sent to it, as well as its stops dispatching messages elsewhere. You can use that to enable something happening in the level at the moment the player completes a certain objective. | Now run the game. When you walk over the sector '''OBJ''' you will hear the elevator moving to the next stop (it is placed right next to you so you can hear it. In a normal game the '''complete''' sector is usually placed far away). Then when you pick up the '''Death Star Plans''' you will hear the elevator once again moves to the next stop and thus completes the mission. The neat thing here is that the '''complete''' elevator can be treated just like any other - with messages being sent to it, as well as its stops dispatching messages elsewhere. You can use that to enable something happening in the level at the moment the player completes a certain objective. | ||
| Line 268: | Line 268: | ||
# Look at the existing tutorials in the [https://df-21.net/articles/ Articles] section of DF-21.net | # Look at the existing tutorials in the [https://df-21.net/articles/ Articles] section of DF-21.net | ||
# Ask for support in the DF-21 [https://discord.gg/6T9NvMh2MC Discord] #df-modding or #level-editor channels. | # Ask for support in the DF-21 [https://discord.gg/6T9NvMh2MC Discord] #df-modding or #level-editor channels. | ||
Good Luck and go make some wonderful maps! =) | Good Luck and go make some wonderful maps! =) | ||
'''WDFUSE Tutorials'''#[[WDFUSE Tutorial - Introduction|Introduction]] | |||
'''WDFUSE Tutorials''' | |||
#[[WDFUSE Tutorial - Introduction|Introduction]] | |||
#[[WDFUSE Tutorial - Configuration]] | #[[WDFUSE Tutorial - Configuration]] | ||
#[[WDFUSE Tutorial - Basic Geometry]] | #[[WDFUSE Tutorial - Basic Geometry]] | ||
Latest revision as of 13:14, 18 March 2024
Scrolling
Let's continue to the hallway at the top where you can learn about scrolling elevators. Every time you see a flowing river or a waterfall; all of it is performed using the scrolling mechanism .
Scrolling Floors
All flowing water in the game is performed with scrolling floors. Come to the river and take a look. You can hear water flowing.
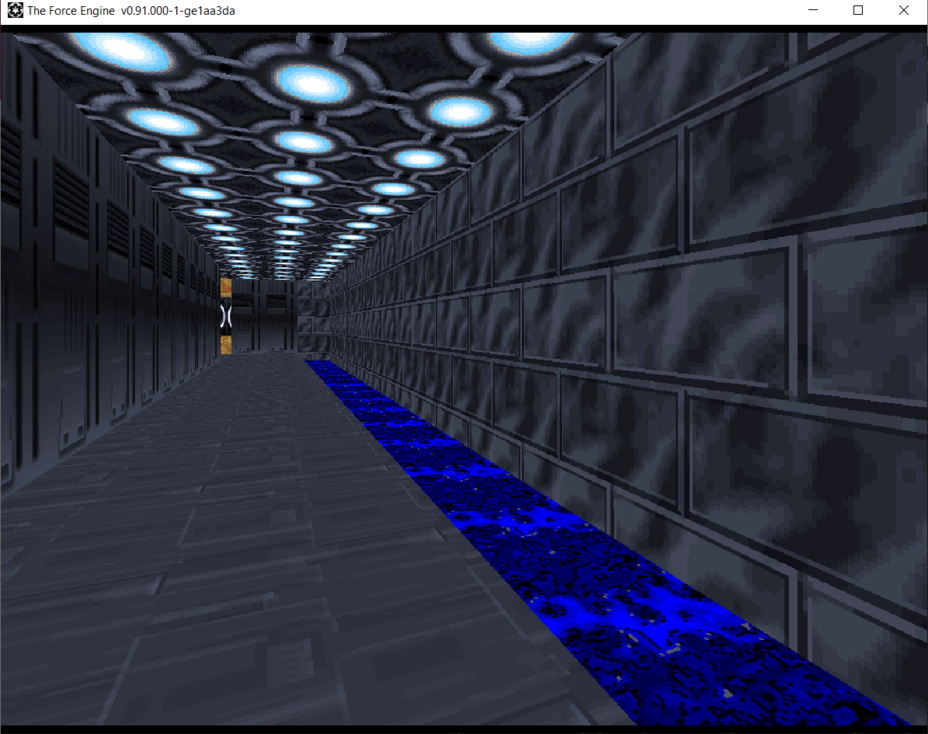
Lets look at the WATER sector code. You can see that it is a new type of elevator.
seq
  class: elevator scroll_floor
      sound: 2 water1.voc
      angle: 270
      speed: 5
seqend
Elevator Scroll_Floor does what the name implies. It just moves the texture on the floor. You can also see that the elevator has a new parameter called angle - all it does is move the water flow in a particular direction. Additionally, to make a nice soothing sound effect, it has a sound value of a waterflow. This means that anytime you are near this sector you will hear WATER1.VOC .
Scrolling Walls
Continue down the hallway and you will see two walls. The one on the right is scrolling and the one on the left is not.
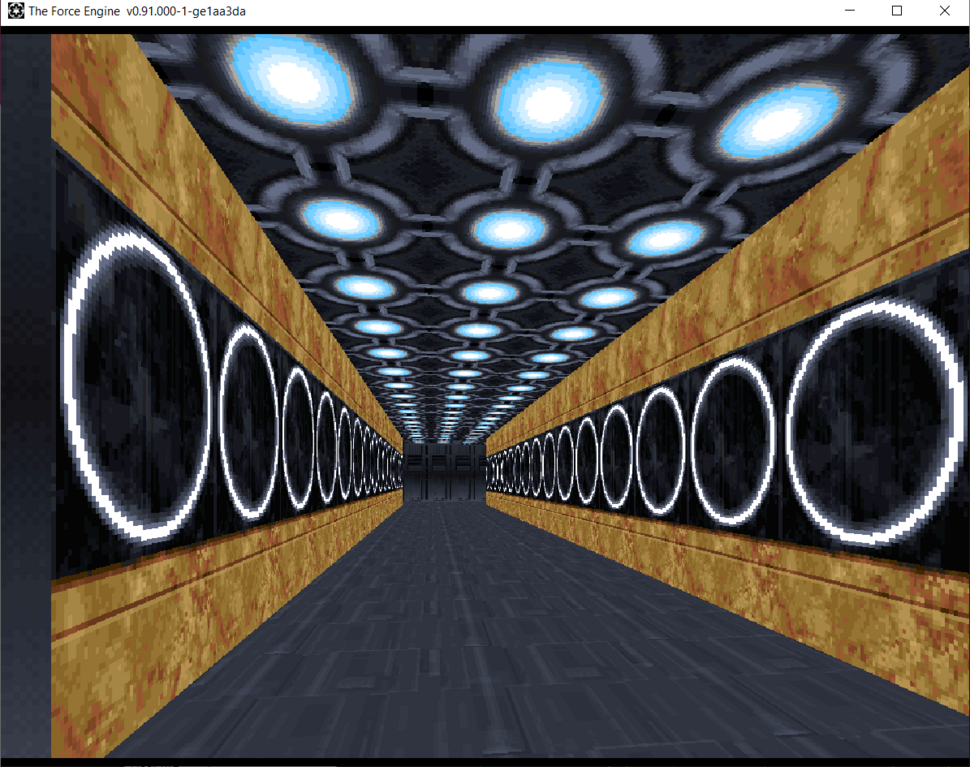
Lets look at the code of the sector SCROLL. It is an elevator class of scroll_wall.
seq
  class: elevator scroll_wall
      angle: 90
      speed: 30
seqend
Scroll_Wall elevators move a wall along a particular angle and speed. They can be applied to the whole sector or a single wall.
You must be wondering, how come the wall on the left is not moving? It's because for a scroll wall to work properly, you would need to apply a specific flag.
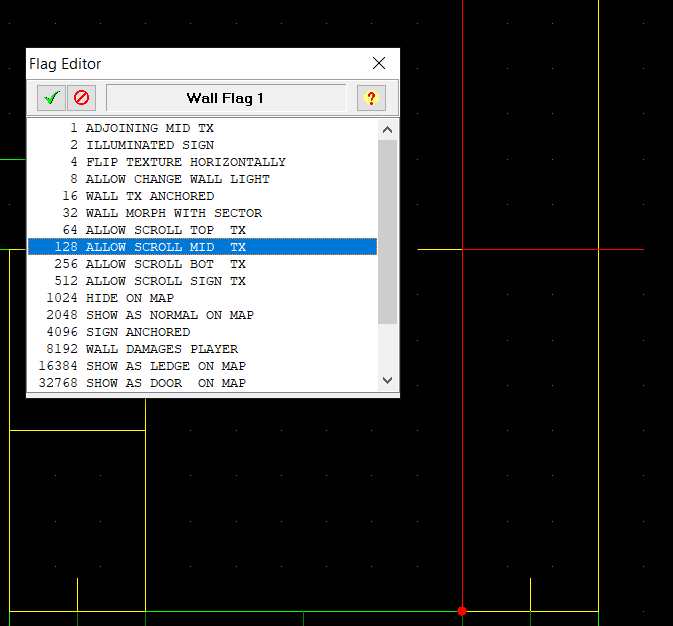
Once the sector is set to be a scroll wall sector you must specify which of the wall sections (TOP / MID / BOT / SIGN ) should scroll. Depending on which you select, they will begin scrolling. To fix the other wall simply change the flag go 128 (Scroll Mid).
Once you fix the other wall you may notice that it scrolls at the same angle as the other one . That's because all the walls always move with the sector's angle command. Lets continue down the hall and around the corner.
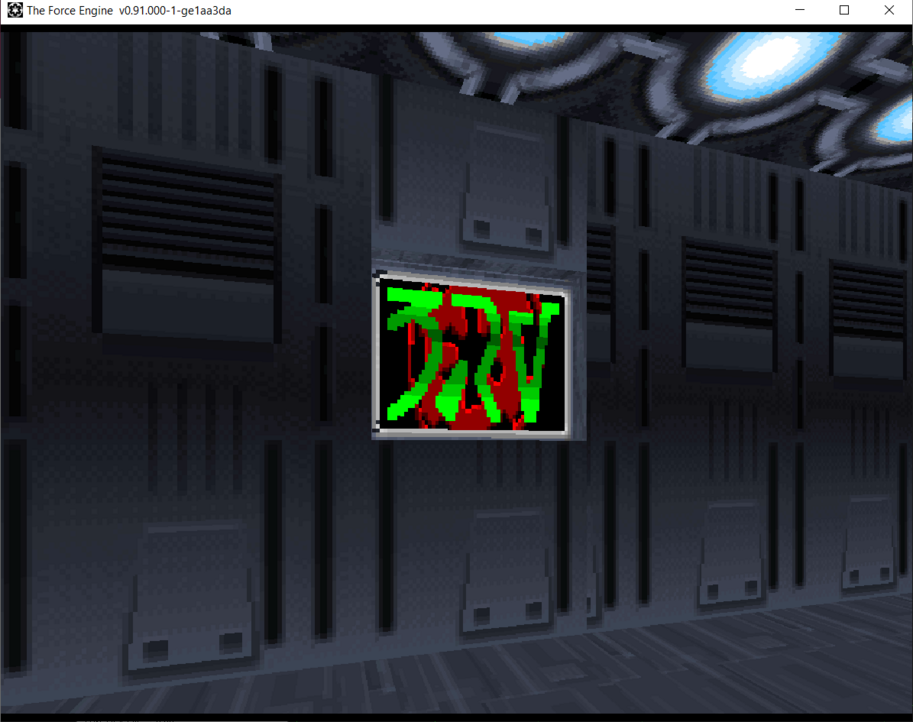
Here you will see a sign that changes between different aurebesh letters. Lets look at the texture first.
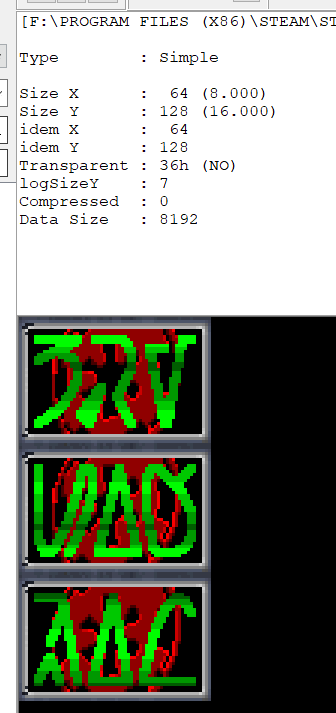
You will see that it is a long texture divided into three parts. How does Dark Forces render it? Click on the SIGN sector code.
seq
  class: elevator scroll_wall
      angle: 0
      speed: 0
      event_mask: 0
    stop: 0 2
    stop: 43 3
    stop: 86 6
    stop: 0 5
    stop: 43 5
    stop: 86 3
seqend
As you see above, this sector is also a scroll_wall elevator class. However in this case, instead of using a hardcoded angle, it jumps between stops on the texture which are really the vertical offsets. You can see that the height of each sign portion is 43 pixels. The first offset starts with 0 while the second starts with 43 and the last is 86.
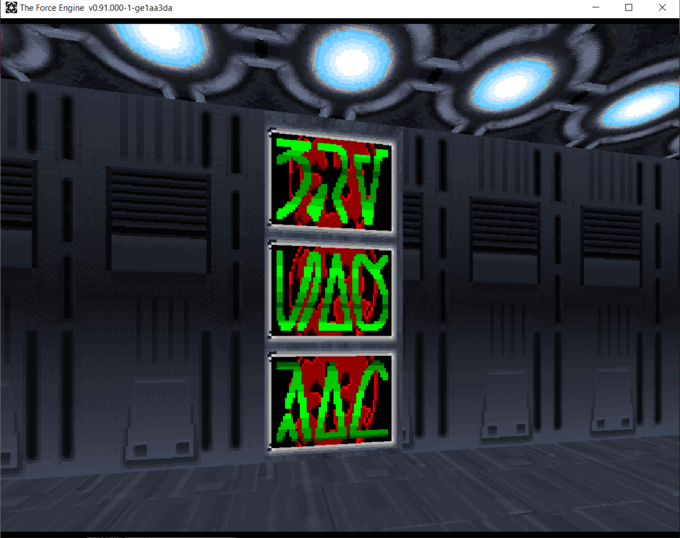
To prove that we are just scrolling the texture. Change the floor altitude of the sector to 0 and change the height to 16. Now you can see that the scroll_wall sector just changes the texture offsets as it scrolls.
Lights
You are already familiar that you can change sector or wall ambient lighting. You can also change them using an elevator. Go around the corner and look at the hallway with the changing lights.
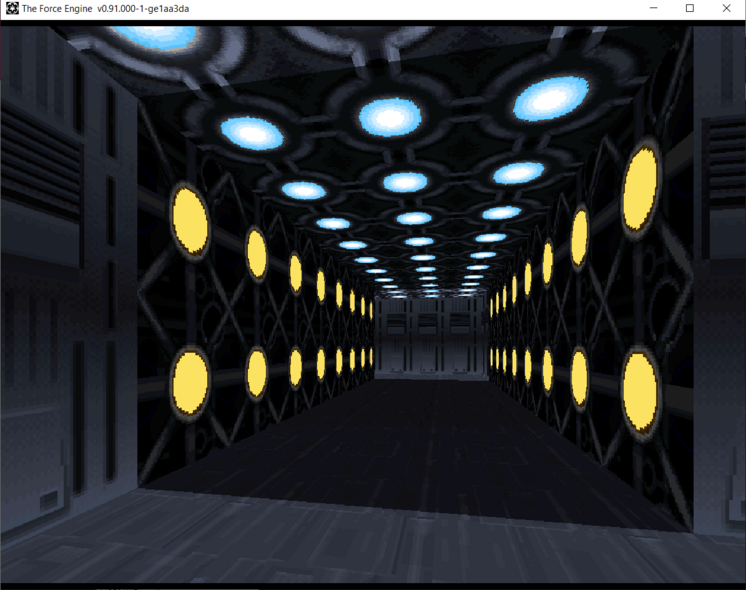
This is a simple elevator. If you look at the code you will see that the elevator change_light just has stops that define the value of the light used by the sector.
seq
  class: elevator change_light
    stop: 0 2
    stop: 31 2
seqend
Above, the stop value 0 corresponds to total darkness and value 31 corresponds to full brightness. You can attach a switch trigger to this elevator and turn room lights on and off as you please! By the way, Dark Forces supports certain colors (representing lights) to remain at their original colors regardless of the light level. These color mappings are part of a different ball game - Dark Forces palette editing.
Morphing Elevators
Go around the corner and look at this large room with multiple moving shapes,
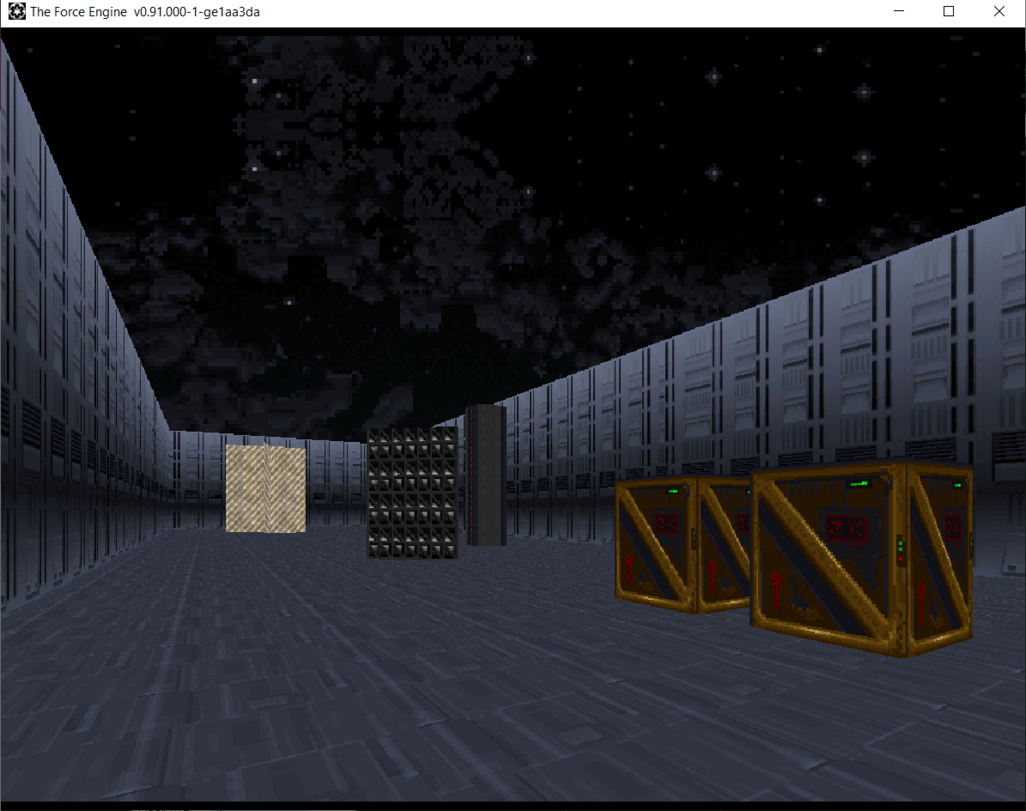
Not everything in Dark Forces only moves up or down. Here you will see a lot of moving shapes that are utilizing the morph and spin elevators.
Morph Elevators
You will see two crates that are slowly moving by themselves. They are two subsectors that start on the right hand of the sector and move back and forth. If you stand in their way they will stop. You can also climb on them.
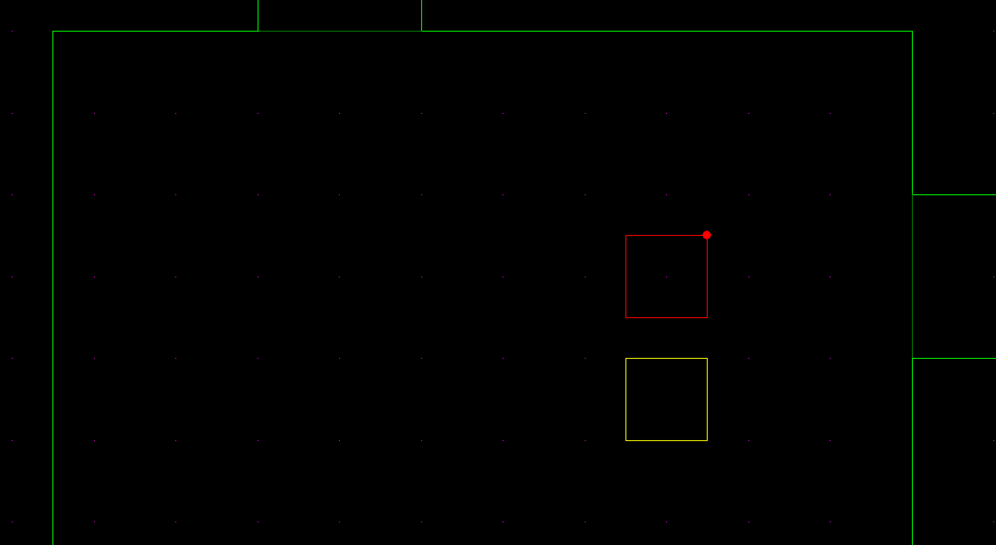
Lets look at the top sector's INF script called CRATE .
seq
  class: elevator morph_move2
      sound: 1 DOOR1-1.VOC
      sound: 2 NOSOUND.VOC
      sound: 3 NOSOUND.VOC
      angle: 270
      speed: 5
    stop: @0 2
    stop: @40 2
seqend
You can see that it is of type elevator morph_move2. There is also a morph_move1 and the main difference between them is that the player can ride the elevator with move2 but they cannot with move1. You can see that the sounds are set where on start of movement they play a DOOR1-VOC and no sounds for movement or stopping. Just like the scrolling elevator they have an angle to specify the angle at which they are supposed to move. You will see that the stops have @ in front of them which means they move at relative position to the beginning. In reality, they just move 40 Dark Forces Units (dfu) to the left and come back on a loop.
One important thing you must learn is that when you use morphing sectors the walls also have to move. This is not enabled by default. In order for walls to move (morph) they must be tagged with "Wall Morph With Sector" flag (32).
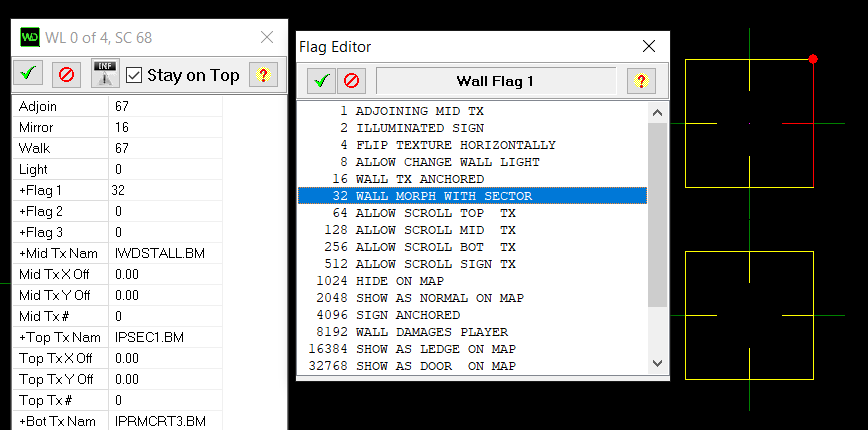
Remember! Every wall (inside and outside the subsectors) in this room must have flag 32 or the morphing sectors will not move.
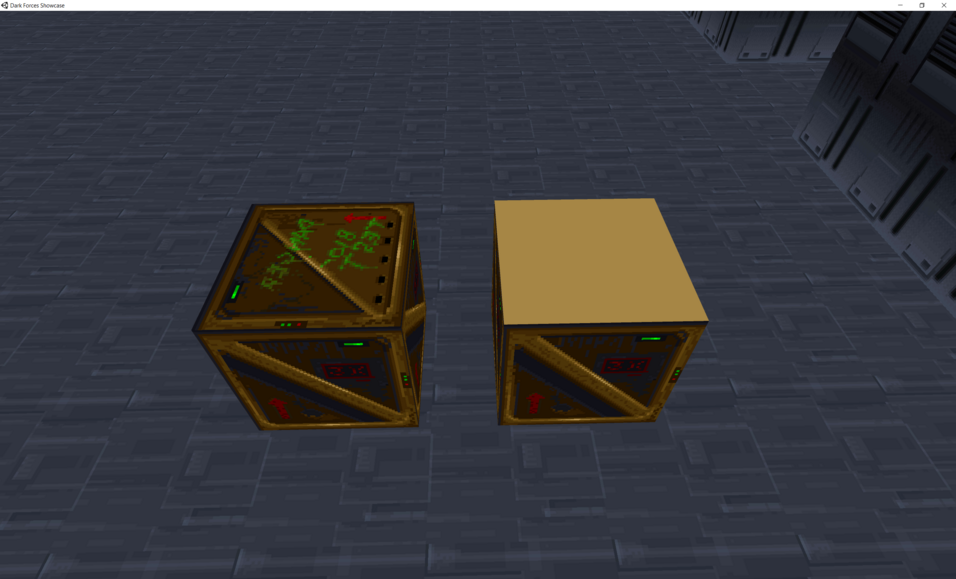
One interesting thing you may notice is that the top textures are quite different. The texture on the top one is solid-colored and the bottom one has a full texture. You will now learn this is the case.
Morph Scroling
Look at the second crate called CRATE2 . On top it has a texture that moves along the elevator. However, you will see that the texture is not tied to the crate as it moves along. That is because by default floor textures are not anchored. In fact, you cannot anchor floor textures like you can with walls. So what can we do? Because right now the INF code of CRATE2 is identical to CRATE .
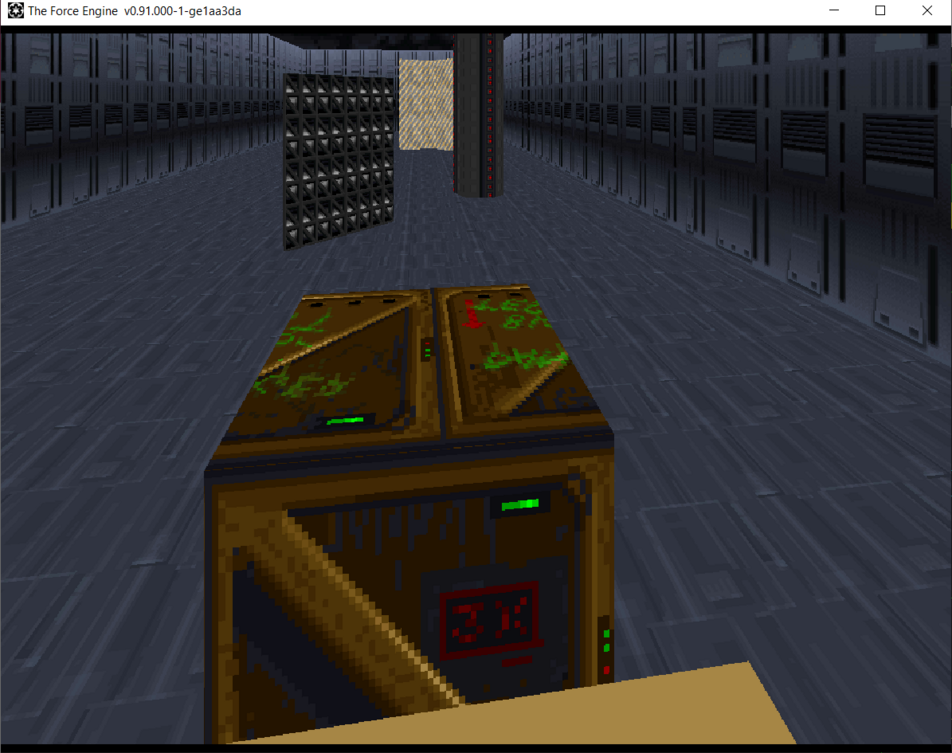
The solution is to use the scroll_floor elevator you've learned before. Take a look a the code below.
seq
  class: elevator morph_move2
      sound: 1 DOOR1-1.VOC
      sound: 2 NOSOUND.VOC
      sound: 3 NOSOUND.VOC
      angle: 270
      speed: 5
    stop: @0 2
    stop: @40 2
  class: elevator scroll_floor
      flags: 0
      angle: 270
      speed: 5
    stop: @0 2
    stop: @40 2
seqend
The code sequence above is overloaded by another elevator called scroll_floor. As you see, you can combine multiple classes to make unique combinations. In this case, the scroll_floor moves at exactly the same angle and position as the sector. What this does is make the texture on top of the crate move along with the elevator.
Give the above code a try and you will see that the floor texture now flows at the same speed as the crate moves. In Dark Forces, any time you see a texture that moves on the floor it is because it is being scrolled by a scroll_floor elevator. This is how it is done in the Detention Center moving platform. It is a morph elevator with a scroll_floor texture.
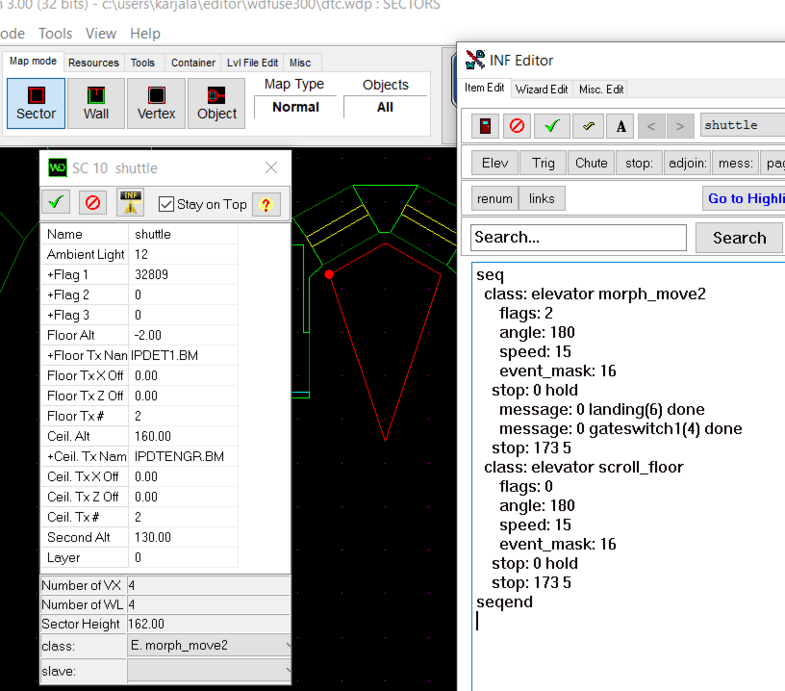
The box at the top hides the fact that it is scrolling by using a single color texture. This kind of "workaround" is used by all morphing elevators in the game.
Spin Elevators
Dark Forces elevators not only move along the X,Y,Z axis but can also spin place. Lets take a look at the triangle-shaped spinning sector called SPIN1.
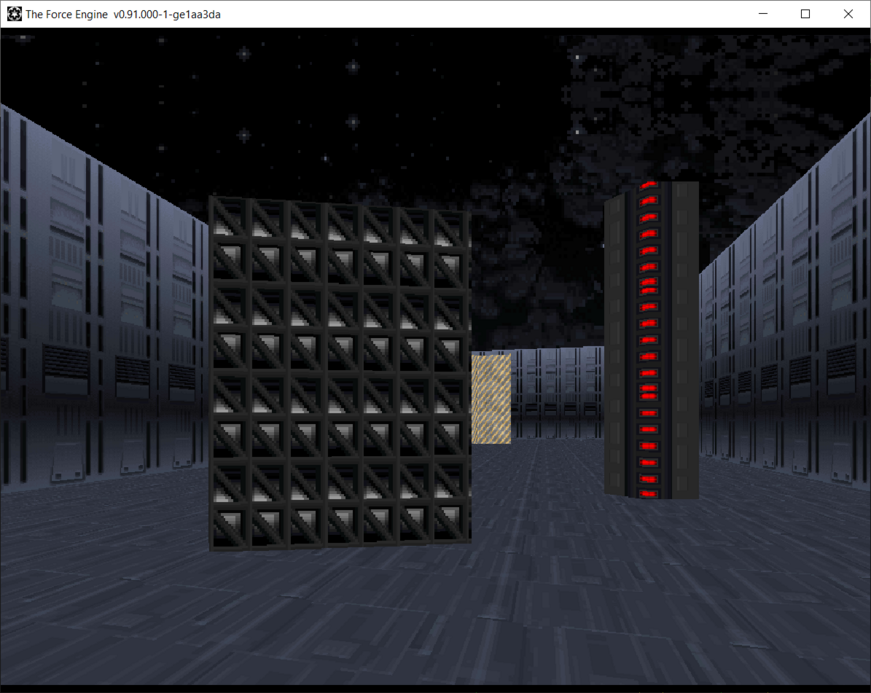
As you can see - the triangle shape is spinning in one position. Lets look at the code.
seq
  class: elevator morph_spin1
      sound: 2 NOSOUND.VOC
      center: -88 132
      speed: 30
seqend
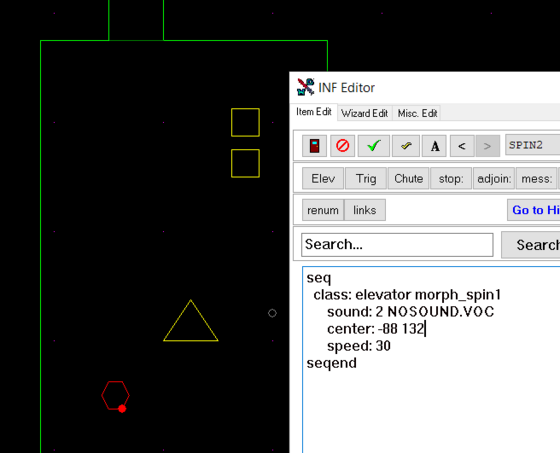
As you see we are now using an elevator of type morph_spin1. This type of elevator spins in one place around a position called center. In this case, you simply specify the X and Z positions of the position the elevator should spin around. The trinagle is spinning around position X=-88 and Z=132 If you ever wonder what position a particular point is at simply look at the map window's position in the bottom left corner.

In this case you are at X=-108 and Z=264
Lets look at the hexagonal sector named SPIN2 . It is spinning around a position (-110 , 112) which is the center point of the elevator.
seq
  class: elevator morph_spin1
      sound: 2 NOSOUND.VOC
      center: -110 112
      speed: 30
seqend
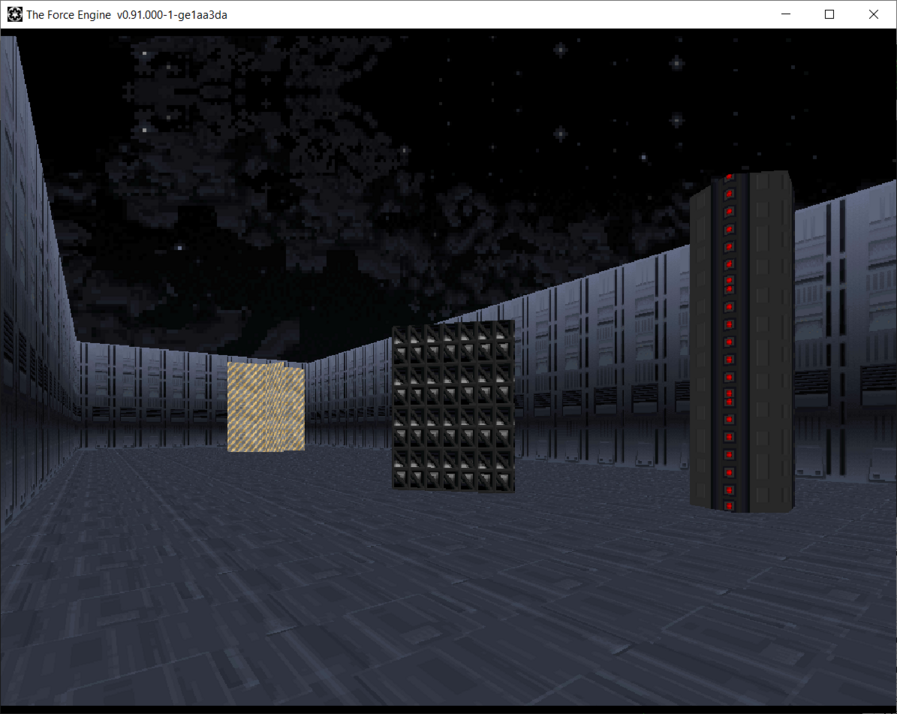
Let's have some fun. Change SPIN2 's center position to be the same as the triangle position (-88, 132) and run the game.
Now the hexagon shape spins AROUND the triangle. Neat!
Morph-Spin Elevators
Now lets look at the the last sector in this room called SPIN3 . It's a spinning star .... that also MOVES back and forth.
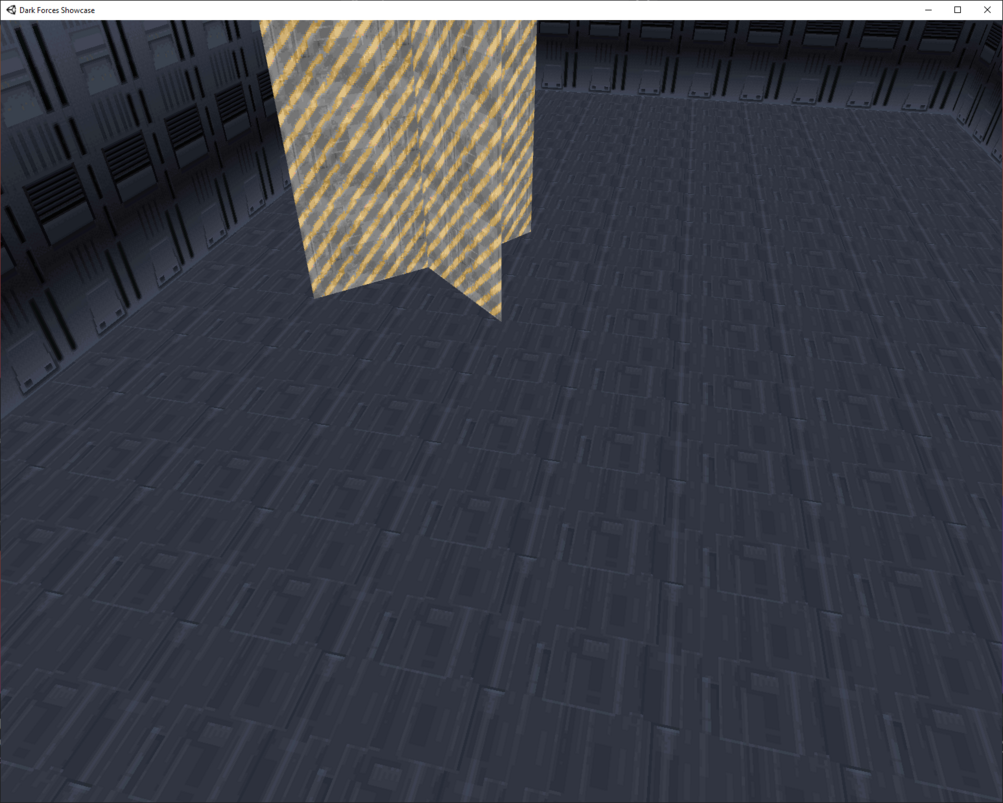
Let's look at the code. You can see that this sequence consists of two classes morph_move2 and morph_spin1.
seq
  class: elevator morph_move2
      sound: 1 NOSOUND.VOC
      sound: 2 CONVEYER.VOC
      sound: 3 NOSOUND.VOC
      angle: 270
      speed: 100
    stop: @0 2
    stop: @60 2
  class: elevator morph_spin1
      sound: 2 NOSOUND.VOC
      center: -87 32
      speed: 70
seqend
You can see that the first part is the movement part. It is moving back and forth just like the crates above. The second part is the spin you've seen before. As you see, once again, combining elevator classes creates some unique results. For fun, try changing the speeds of both elevators to 500 and see it spin maddingly across the sector. If you could wall damage flags to it you could create a nasty trap for Kyle!
Sadly, since Dark Forces does not support floor texture rotation, the same trick as above for scrolling sectors cannot be used here.
Text and Sounds
Lets continue to the hallway at the top of the MORPHS sector , there you will see two small rooms. Here you will learn how to play audio messages and send text messages to the player (the ones that appear in the top-left corner).
Sounds Effects
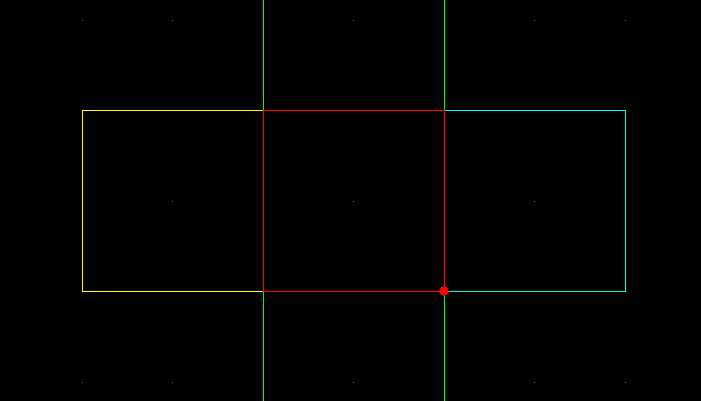
When you enter the one on the left you will hear an alarm sound. Lets look at the code of the SOUND sector.
seq
  class: elevator change_light
      event_mask: 4
    stop: 30 hold
    stop: 31 0
      page: 1 BEEP-01.VOC
seqend
You can see that this is a sector that changes light from 30 to 31 (You probably didn't notice it did you?). It's just a dummy way to to make the elevator change stops without a player noticing. You could also have used a scroll way without allowing any of the walls to scroll. In any case, you can see that as you enter the sector (event_mask: 4) it uses a new command called page . A Page plays a sound effect when an elevator arrives at a stop. "Page:" is placed in an elevator's sequence.
usage:
| | page: [stopnum] [VOC file] |
This is how you the game plays audio messages from Jan as you play the game. One important thing to know. You cannot send pages from triggers, only elevators. And try to add a delay between stops if you play many audio effects. Otherwise you will have one sound cut off the other one (and there is also an 8 concurrent sound limit at a time).
Text Messages
Now walk over the sector called TEXT on the right.
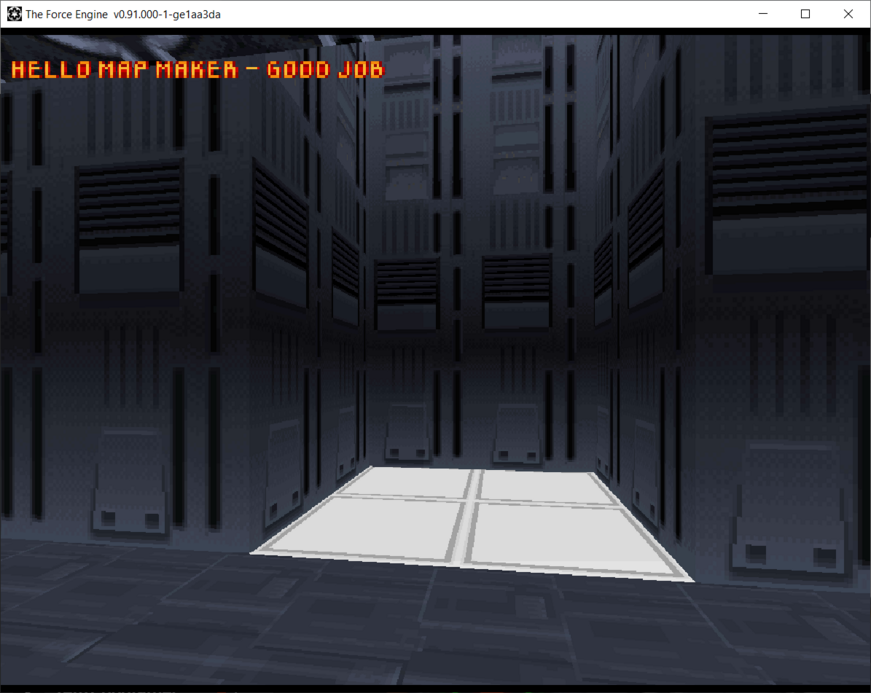
As you walk over it - you will see a text message "Hello Map Maker - Great Job". Let's look at the code.
seq
  class: trigger
      event_mask: 4
      text: 350
seqend
As you see, it is a trigger that activates when you walk over it. It then sends a text message with a value of 350. But what is this 350?
All text messages in the game are saved in a file called TEXT.MSG. You can see it in your project folder. To edit it go to your Main Menu and click on View-->Editors-->MSG
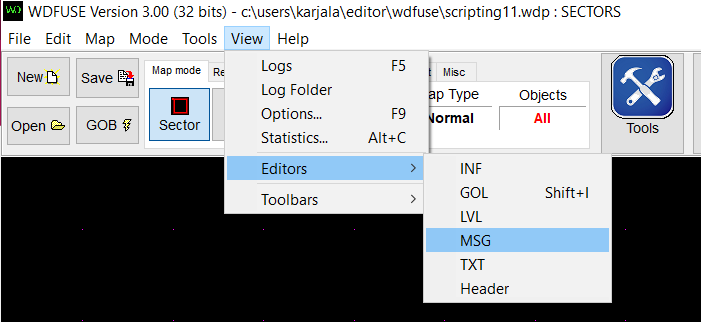
You will see WDFUSE open the text message file editor. You can see that for the value 350 we've set it to "Hello Map Maker" mesage.
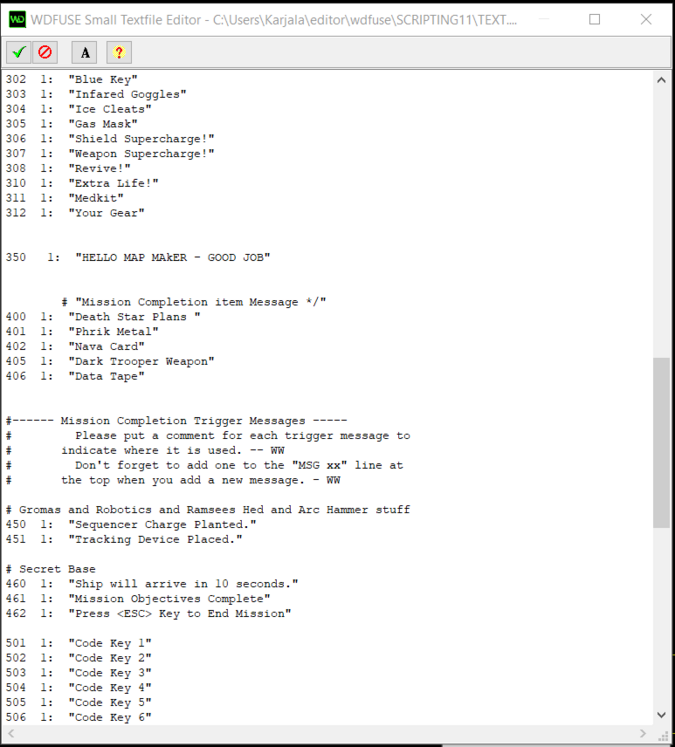
You can change any value to say whatever you want. For example, you could make a map where instead of "Death Star Plans" you could change it to "Dark Forces Source Code". In fact... do it now!
Go ahead and change the value of line 461 from "Mission Objectives Complete" to "WDFUSE Tutorial Completed". One important thing to do before you save and commit your changes (Green checkmark at the top). If you ever add a NEW message you have to update the total # of MSGs at the top of this file.
MSG 1.0

# number of actual messages
MSGS 113
In fact, the developer Winston Wolff (for whom the character from the film Pulp Fiction is named) warns you about it.
#------ Mission Completion Trigger Messages -----
#         Please put a comment for each trigger message to
#       indicate where it is used. -- WW
#         Don't forget to add one to the "MSG xx" line at
#       the top when you add a new message. - WW
Mission Completion
Go around the corner and you will see the Death Star Plans.
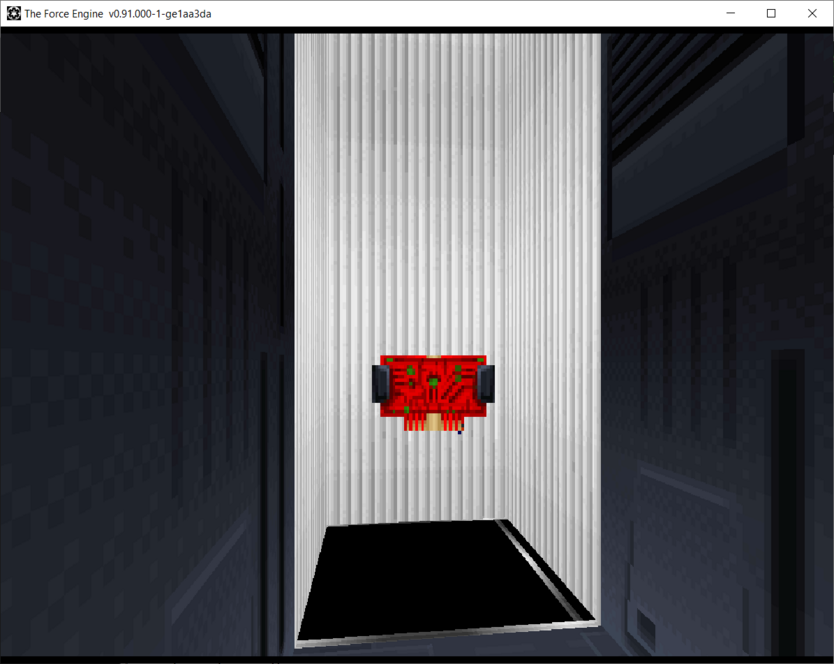
If you pick them up, you will hear an elevator sound moving and receive a Mission Objectives Completion message (And if you changed the TEXT.MSG file from the previous lesson- it should say "WDFUSE Tutorial Completed" ).
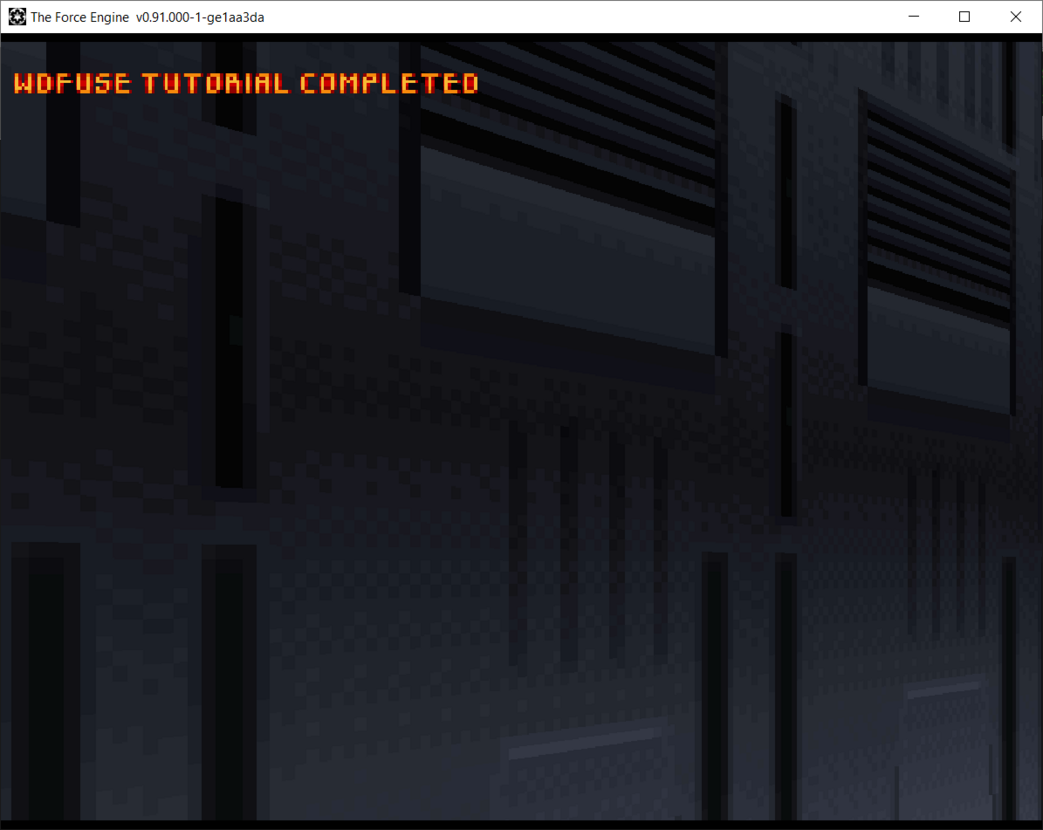
How is this done? Open up the map and look at the large C-shaped sector that is called COMPLETE.
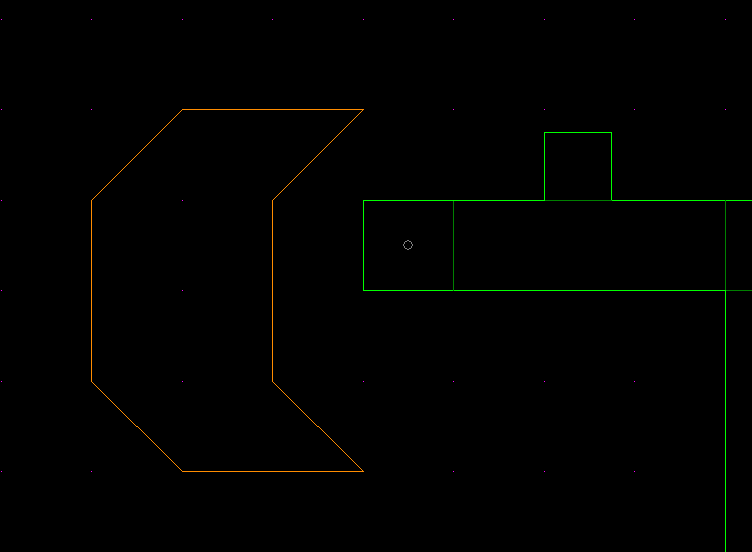
This is a unique sector that keeps track of how many steps you have to take until you reach the end of the mission. The sector name must be called complete otherwise the objective logic will not work. Lets look at the source code.
seq
  class: elevator move_floor
      speed: 0
    stop: 1 hold
    stop: 2 complete
seqend
You can see that it is a simple move_floor elevator. It starts at position 1 and waits there. When it receives a message to go to the next stop it reaches stop #2 and runs the complete command. When it does, this ends the mission and you will get the "Mission Completed" message. So what tells this sector to move to the next part? It is the LOGIC: PLANS section of the Death Star Plans object.
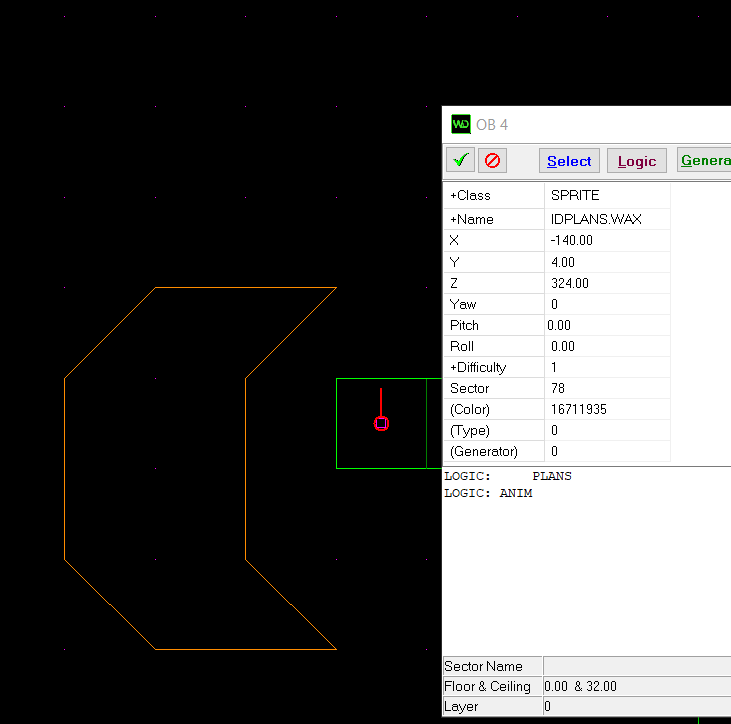
But what if you do not want an item to tell the complete elevator to go to the next stop? Well you can do it with triggers! Lets make a few changes.
First of all, lets add one more stop to the complete elevator so you would have two objectives.
seq
  class: elevator move_floor
      speed: 0
    stop: 1 hold
    stop: 2 hold
    stop: 3 complete
seqend
Now the elevator will start at stop 1. Wait until you pick up plans and then go to stop 2. We'll now add a trigger to tell this elevator to go to the next stop.
Click on the small sector called OBJ and lets add new code to it.
seq
  class: trigger
      event_mask: 4
    client: complete
seqend
Now when you walk (event_mask: 4) over this sector, it will send a next_stop message to the elevator complete.
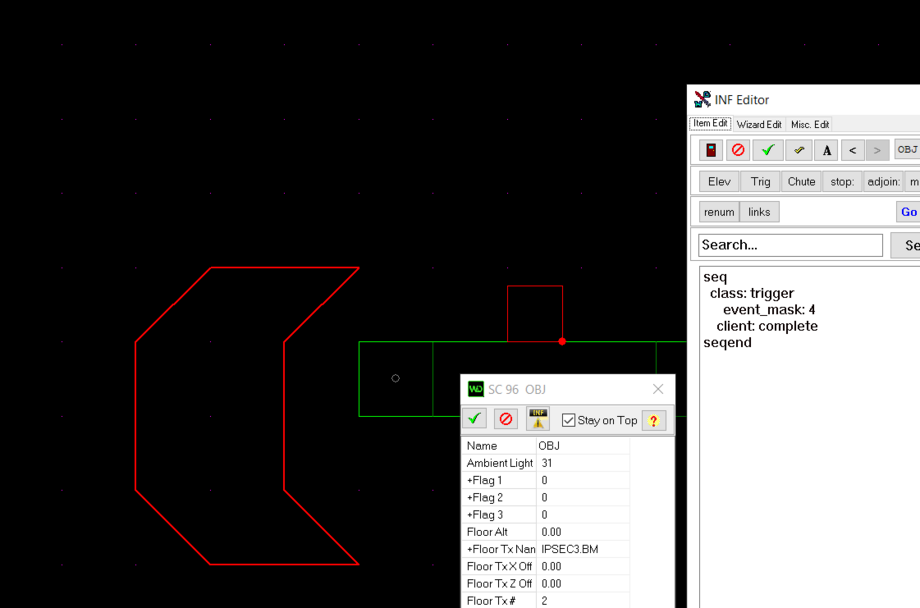
Now run the game. When you walk over the sector OBJ you will hear the elevator moving to the next stop (it is placed right next to you so you can hear it. In a normal game the complete sector is usually placed far away). Then when you pick up the Death Star Plans you will hear the elevator once again moves to the next stop and thus completes the mission. The neat thing here is that the complete elevator can be treated just like any other - with messages being sent to it, as well as its stops dispatching messages elsewhere. You can use that to enable something happening in the level at the moment the player completes a certain objective.
Great Job! You've now reached the end of the current tutorial. You've learned enough to make your own missions. Here are some important pointers.
- Remember that the best way to learn is to practice and to see how other map makers made their missions.
- You can always copy and paste sectors and objects from one mission to the next (CTRL-C and CTRL-V).
- Read and Re-Read the DF-SPECS page - the INF portion is critical.
- Look at the existing tutorials in the Articles section of DF-21.net
- Ask for support in the DF-21 Discord #df-modding or #level-editor channels.
Good Luck and go make some wonderful maps! =)
WDFUSE Tutorials
- Introduction
- WDFUSE Tutorial - Configuration
- WDFUSE Tutorial - Basic Geometry
- WDFUSE Tutorial - Basic Geometry II
- WDFUSE Tutorial - 3D Renderer
- WDFUSE Tutorial - Advanced Geometry
- WDFUSE Tutorial - Advanced Geometry II
- WDFUSE Tutorial - Advanced Geometry III
- WDFUSE Tutorial - Objects
- WDFUSE Tutorial - Scripting
- WDFUSE Tutorial - Scripting II
- WDFUSE Tutorial - Scripting III